This column is compiled by JCO Technology Editor Marc S. Lemchen, DMD. To help keep our readers on The Cutting Edge, Dr. Lemchen will spotlight a particular area of orthodontic technology every few months. Your suggestions for future subjects or authors are welcome.
In recent years, the contributions of technology to the practice of orthodontics have increased at an ever-quickening pace. In particular, new devices such as smart wires, intraoral scanners, and cone-beam imaging machines have changed the way we practice.
An excellent example is the laser-sintered expander. Resembling the cast expander that has been popular in Europe for many years, this appliance is three-dimensionally printed from metal, based on a routine scan that provides the stereolithographic (STL) data and subsequently the virtual model on which the expander is designed.
Any orthodontist who uses rapid palatal expanders (RPEs) will find this laser-sintered appliance revolutionary. Compared with the traditional banded expander, it can vastly reduce the chairtime and number of appointments required for fabrication and delivery.
MSL
Cementation and Removal of 3D-Printed Expanders
Similar articles from the archive:
Maxillary skeletal transverse deficiency is a common problem that has typically been addressed with maxillary expansion in children and young adults.1-3 Traditional fixed RPEs have several drawbacks, however: banded expanders require the placement of orthodontic separators prior to cementation, while bonded acrylic expanders may encroach on the gingival margins and can be difficult to remove.
In 2018, Graf and colleagues were the first to describe direct metal laser printing of an expansion appliance.4,5 The popularity of these appliances has grown to the extent that several commercial laboratories are now capable of fabricating them. The present article describes the manufacture, placement, and removal of a new 3D-printed expander—the MC1 Direct Metal Printed RPE*—that avoids the disadvantages of previous options.
Procedure
Based on a digital intraoral scan of the patient’s upper arch and palate, the laboratory digitally designs an appliance with partial-coverage metal “islands” on the maxillary molars and premolars and occlusal openings at the first molars (Fig. 1).
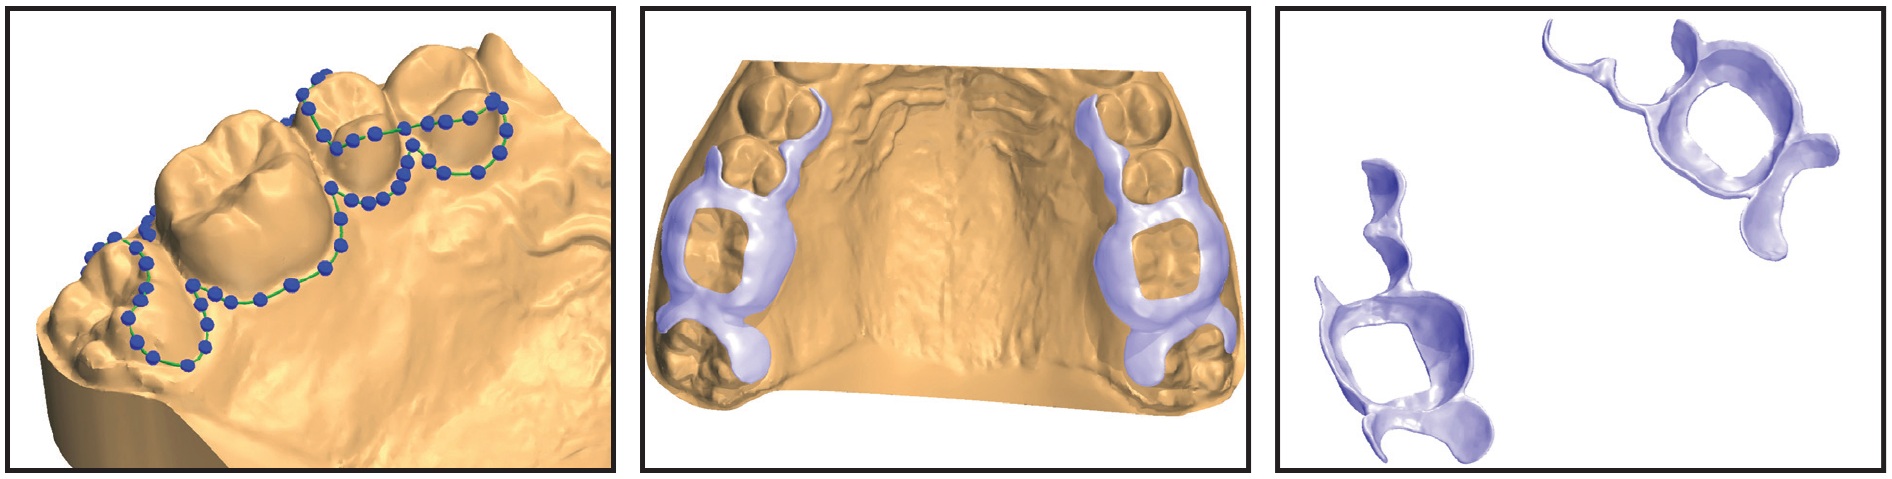
Fig. 1 Digitally designed expander with partial-coverage metal “islands” on maxillary molars and premolars and occlusal openings at first molars.
Optional additions include extensions to the lingual cusps of the premolars and/or second molars (Fig. 2), reverse-pull headgear hooks, and buccal tubes. The lab directly prints the expander by laser sintering of chromium cobalt powder.
Placement of the MC1 expander is simple. First, isolate and dry the teeth to which the appliance will be bonded. I recommended applying a small amount of self-etching primer to the lingual surfaces of those teeth for better retention; to facilitate clean-up on removal, avoid priming the interproximal surfaces. A colored compomer cement such as Ultra Band-Lok** will provide excellent retention as well as easy clean-up and removal, although almost any luting agent can be used. After coating the inner surfaces of the expander with a thin layer of cement (Fig. 3), seat the appliance in the mouth, clean away any excess cement, and light-cure (Fig. 4).
The thickness of the metal on the cusps will produce a slight bite-opening effect. This may be beneficial in deep-bite cases, where it can prevent occlusal interference with mandibular brackets, as well as in hyperdivergent cases, due to the bite-block effect of the metal.
Removal is also simple because of the occlusal openings at the first molars. Remove the MC1 expander with a standard debanding plier, as with a conventional banded expander (Fig. 5).
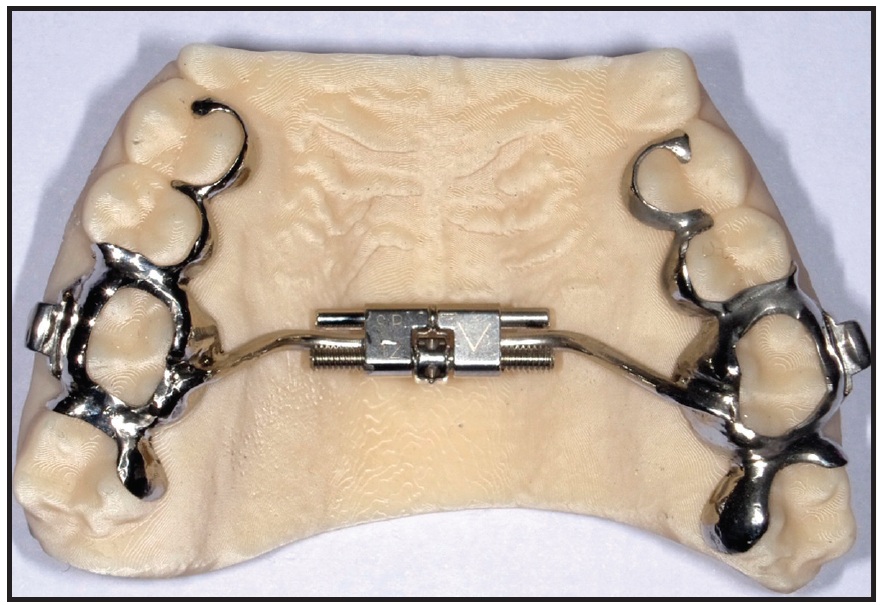
Fig. 2 Finished MC1 Direct Metal Printed RPE* with optional extensions at lingual cusps of second molars.
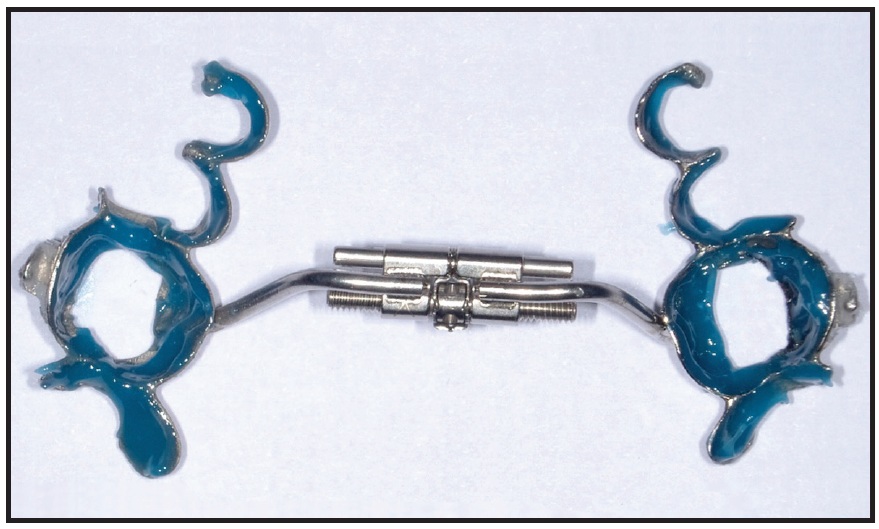
Fig. 3 Inner surfaces of expander coated with thin layer of cement.
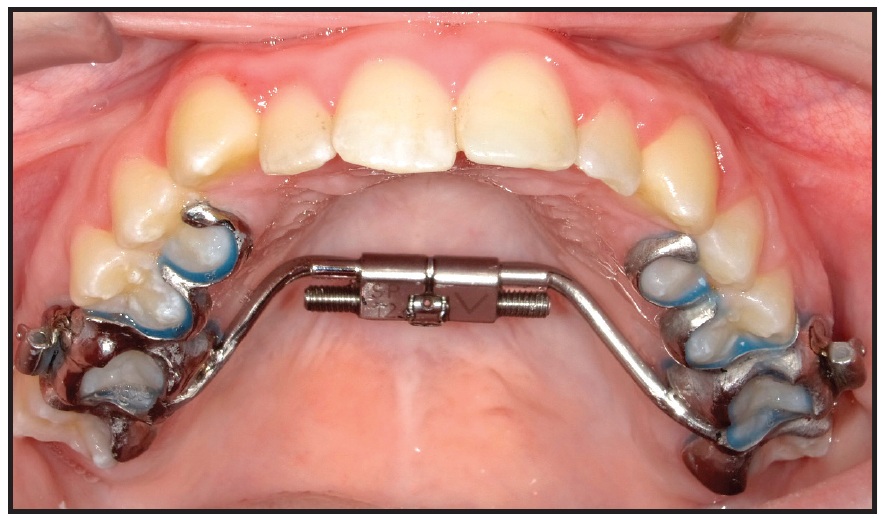
Fig. 4 Expander in place after light-curing.
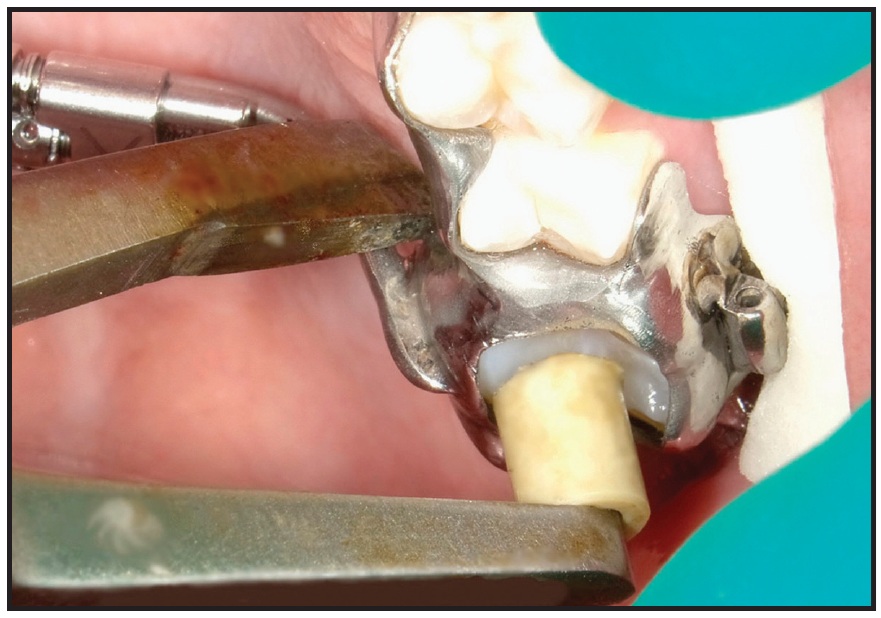
Fig. 5 Expander removed using standard debanding plier.
Conclusion
The MC1 Direct Metal Printed RPE offers several benefits to both patient and doctor. No separator appointment is needed, avoiding patient discomfort; the digital design allows complete customization of the appliance; potential issues regarding accuracy of fit are eliminated by the digital manufacturing process; and both placement and removal are easy.
FOOTNOTES
- *Motor City Lab Works, Birmingham, MI; www.motorcitylabworks.com.
- **Registered trademark of Reliance Orthodontics, Inc., Itasca, IL; www.relianceorthodontics.com.
REFERENCES
- 1. Halpern, M.R.: A study of the maxillary changes during rapid palatal expansion, Am. J. Orthod. 59:302-303, 1971.
- 2. Hoy, H.J.: Evaluation of skeletal, dental, and muscular change in the maxillary first molar plane during rapid palatal expansion as studied by laminagraphic x-rays and specific impressions, Am. J. Orthod. 72:334-335, 1977.
- 3. Hicks, E.P.: Slow maxillary expansion: A clinical study of the skeletal versus dental response to low-magnitude force, Am. J. Orthod. 73:121-141, 1978.
- 4. Graf, S.: Clinical guidelines for direct printed metal orthodontic appliances, Sem. Orthod. 24:461-469, 2018.
- 5. Graf, S.; Vasudavan, S.; and Wilmes, B.: CAD-CAM design and 3-dimensional printing of mini-implant retained orthodontic appliances, Am. J. Orthod. 154:877-882, 2018.
-
 DR. COLEMAN
Dr. Coleman is in the private practice of orthodontics at 7800 Providence Road #201, Charlotte, NC 28226; e-mail: ggcdmd@gmail.com.