JCO Interviews Dr. Homer W. Phillips on Bonding, Part 1
DR. GOTTLIEB Do you think that bonding has arrived as a substitute for orthodontic banding?
DR. PHILLIPS I definitely do. Many simple everyday things that we take for granted have evolved because someone came up with a better idea. The same is true in the transition from bands and brackets to bonded brackets. The bracket is the important part. The band is just something that is in the way, in my opinion, and bonding is just the most recent improvement in the attachment of brackets.
DR. GOTTLIEB Do you think that it's important for orthodontists to know the differences among the adhesives as far as their chemistry is concerned and how they are supposed to work?
DR. PHILLIPS I don't think they have to be able to write the formulas, but they definitely need to know the chemical and physical properties associated with these products. They need to know the difference between a thermoset and a thermoplastic adhesive; that GMA's are more rigid than acrylics, have less water absorption, and are more subject to impact fracture. That sort of thing is Important. You have to know the physical properties of the materials you are working with, or you can't work with them intelligently.
DR. GOTTLIEB Do the physical properties vary enough so that they are going to be important for an orthodontist in making his selection?
DR. PHILLIPS It isn't quite as important to know their properties as it was a few years ago when the acrylic systems were a big part of the market. The majority of adhesives in use in the U.S. today are the two-part Bis-GMA adhesives that are self-polymerizing when mixed, some of them with a two-part unfilled resin sealant and some without. The ultraviolet systems are good systems, but are not in wide use today. Clinicians seem to feel they don't need the extra timing that the ultraviolet systems provide and, if they are using metal brackets, the UV light doesn't cure the adhesive under the bracket pad. You really have to use transparent or translucent brackets for that.
DR. GOTTLIEB Are all Bis-GMA adhesives pretty much the same?
DR. PHILLIPS You can get a very acceptable adhesive from virtually any manufacturer. They do vary in percentage of filler, and in composition and size of filler particles. These differences, plus chemical modifiers, make for variable abrasion resistance, viscosity, and hardness.
DR. GOTTLIEB Is it the way that the operator handles the material that makes the difference in performance?
DR. PHILLIPS Technique is all-important. Adhesives and bracket bases have improved so much in recent years, that the weak link, without a doubt, is operator technique. These excellent materials must be handled with greater care and greater precision in following directions than was necessary in banding techniques. You just don't have the leeway, if you are going to achieve optimum bond strength.
DR. GOTTLIEB What is the significance of the bond strengths of the various adhesives? Is the least strong adhesive strong enough, under certain circumstances, to fill the bill and hold a bracket on a tooth satisfactorily?
DR. PHILLIPS I would say that the bond strengths of present day Bis-GMA adhesives used with proper technique far exceed the clinical requirements for keeping a bracket on a tooth for a typical two-year treatment period. I think there is no question about that. What the minimum suitable bond strength is, I think is an unanswered question.
DR. GOTTLIEB And requirements vary for different bonding sites.
DR. PHILLIPS There is no question that anterior teeth require less bonding strength than posterior teeth and the chances are that the present materials are up to 50% stronger than they need to be. That extra strength is worthwhile, however, because not every operator puts every bracket on in the most optimal fashion. The extra strength allows for some sloppiness in technique. With proper technique, there is no question that the maximum bond strength attainable with present materials is far stronger than we need. But, bond strength alone is not the only factor in terms of clinical effectiveness. For instance, any acrylic system absorbs water to a far greater degree than the denser Bis-GMA molecule, and this will weaken an acrylic bond over a period of time in the oral environment. I don't consider acrylic systems to be the state of the art at this time.
DR. GOTTLIEB How much guidance can be had from laboratory tests comparing various adhesives?
DR. PHILLIPS There seems to be variation between conditions in the laboratory and in the mouth. We don't really know if there is any one test that will show the superiority of one adhesive over another. We don't really know whether it's water absorption or shear strength or peel strength that is most important. You can compare different adhesives for different physical properties in the lab, but I don't think you can correlate laboratory findings directly with what happens in the mouth, and bond strength alone may not be the best guide anyway. Such properties as shelf life and ease of manipulation have a bearing on clinical usefulness.
DR. GOTTLIEB Homer, you are a leading exponent of indirect bonding. I think our readers would appreciate hearing from you the details of your indirect technique. Let's do the laboratory phase first.
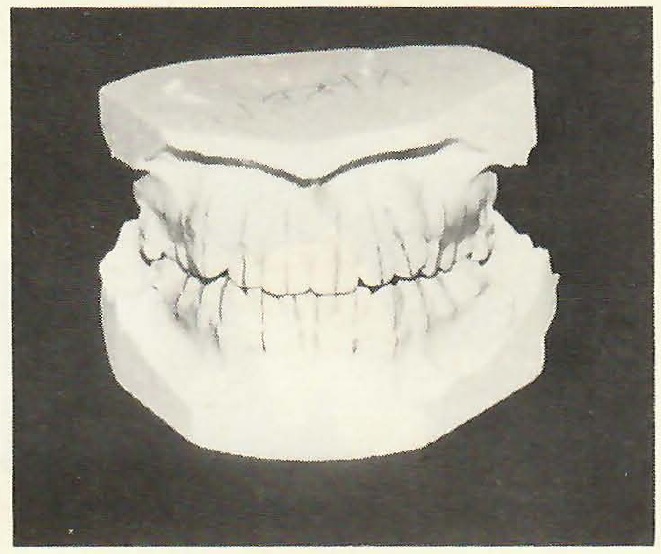
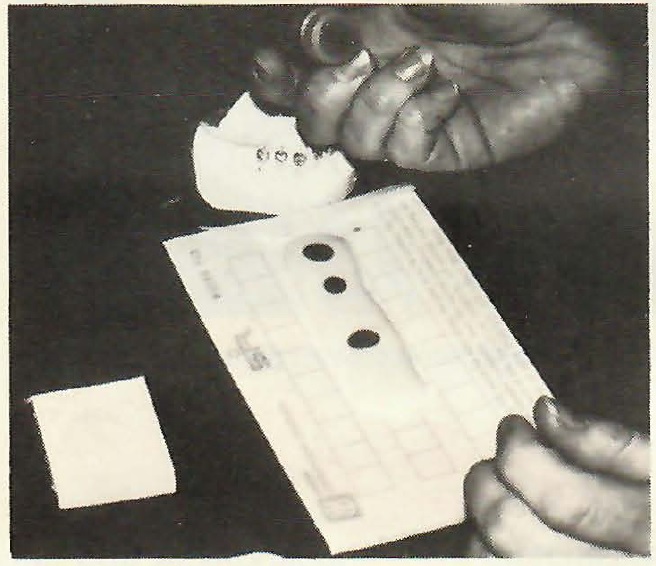
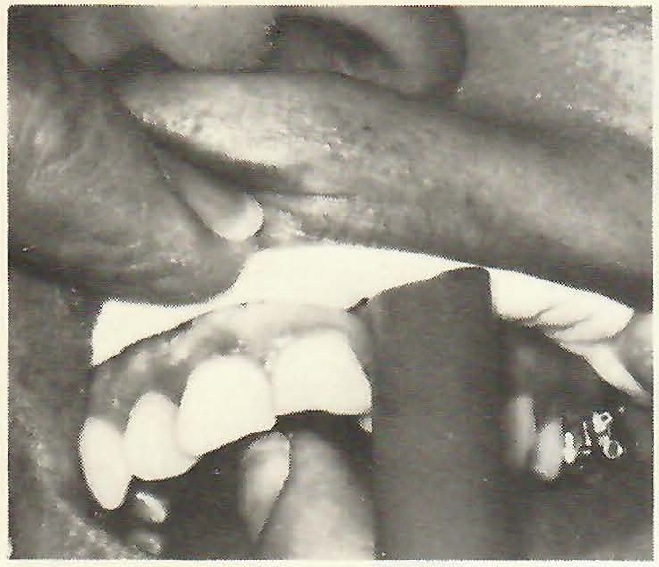
DR. PHILLIPS First you need a recent model of the mouth. How recent depends on the age of the patient and the condition of the mouth. For a young patient with erupting teeth, I would not want to use a model that was over two weeks old. A model taken following extractions, which is a sequence I don't prefer, I would want to use within one or two weeks at most. With a full, stable, adult arch, I don't hesitate to use a model that's a month old. The first step on the model in the laboratory is to draw the long axis of the clinical crown and extend that line onto the gingiva, well below the gingival margin of the tooth. This gives us a bigger target to shoot at with the bracket. If you have a tooth with a short clinical crown and draw a reference line only on the crown of the tooth, you lose sight of the line as you approach the tooth with the bracket in a holding instrument. If you have extended the line well onto the gingiva, then you can see it, and it gives you a landmark to parallel to.
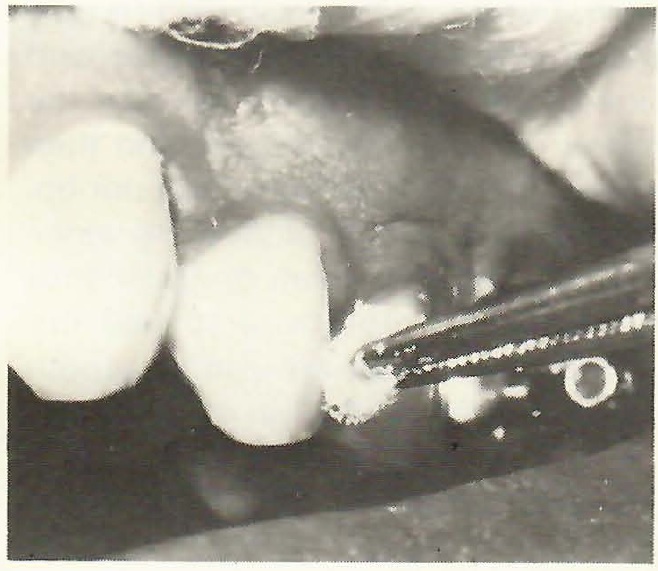
[show_img]391-jco-img-0.jpg[/show_img] Guide lines drawn on a model.DR. GOTTLIEB It is not always so easy to draw that line. Have you any suggestions about that?
DR. PHILLIPS It is true that we are dealing with a biologic system and that teeth are not regular geometric objects. They are irregular and they are in various positions. So, it's not always easy to decide where the long axis is. To aid in that, at least in the early stages of training our technicians, we have them draw not only the long axis on the labial surface, but also draw the midline of the occlusal surface and extend that line down the lingual. Once that is done, they may want to change the labial long axis line. That's one reason I believe that the indirect method makes for more precision; because, if it's hard to do in the lab, it's definitely harder to do in the mouth, where you have much poorer access and can't draw lines the way you can on a model. After we have marked the long axis on the teeth, we paint the models with a tin-foil substitute to facilitate bracket removal later. Following that, we are ready to place the brackets on the model, with Concise.
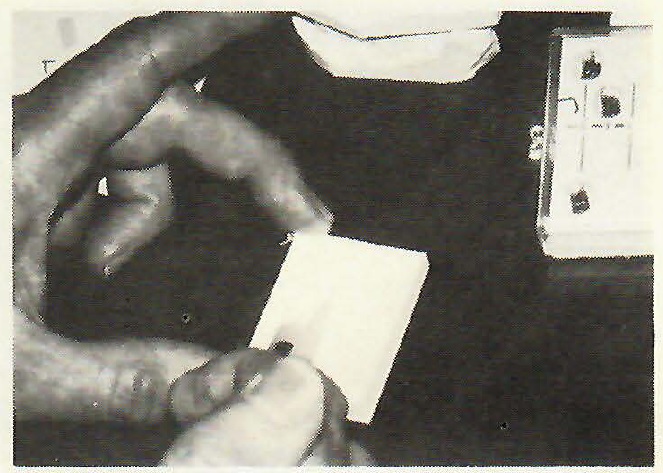
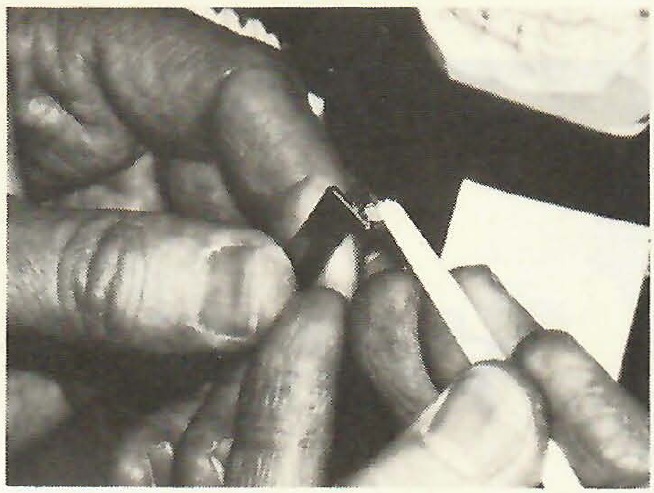
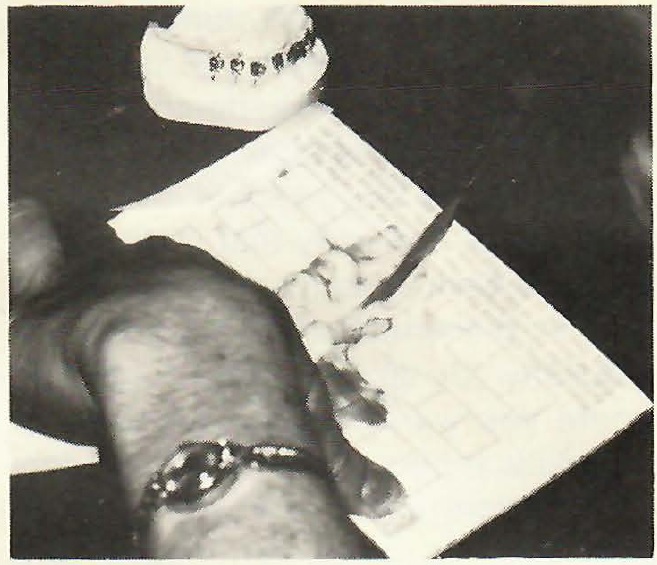
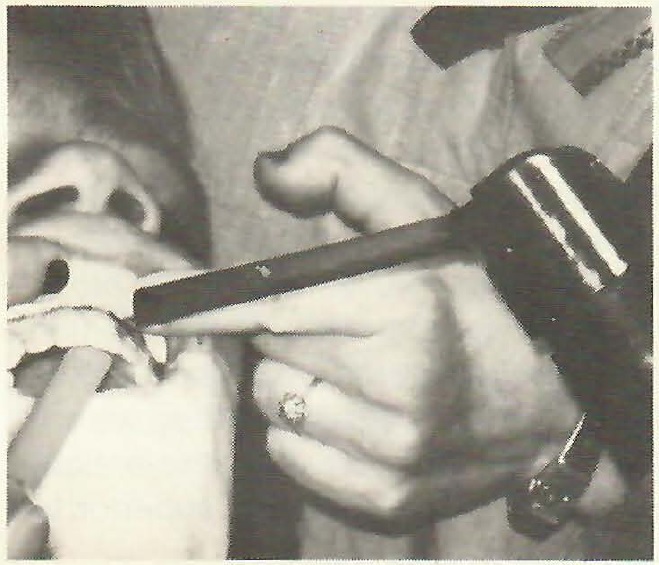
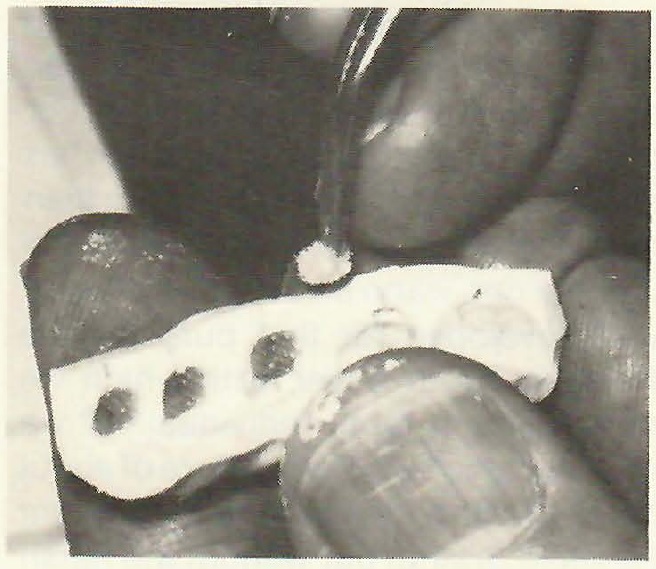
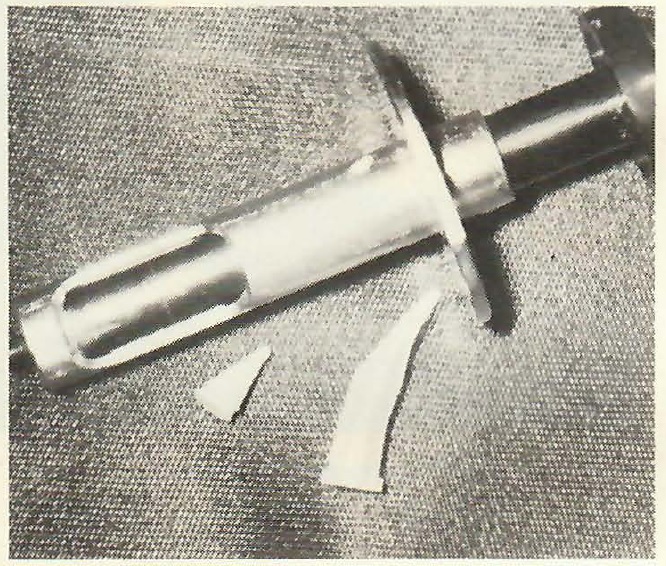
[show_img]391-jco-img-1.jpg[/show_img] Dispensing the composite from a syringe.
DR. GOTTLIEB How many brackets will you cement on the model at a time?
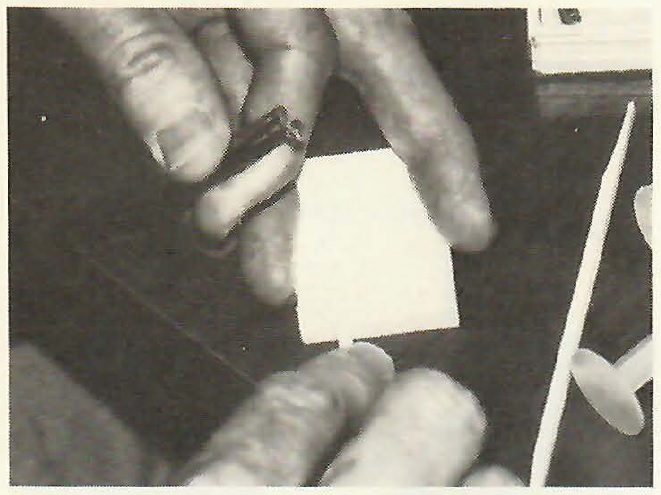
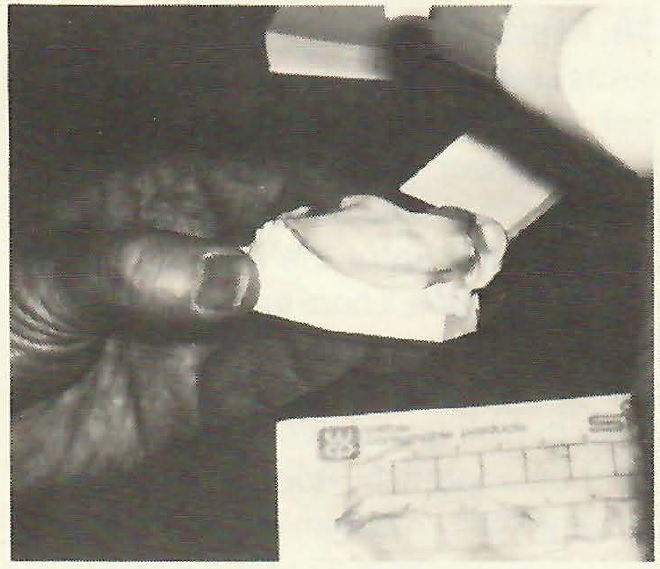
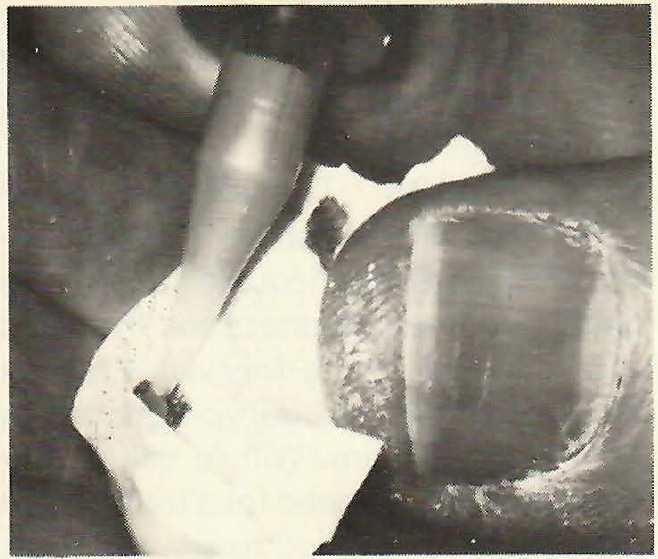
DR. PHILLIPS Only one bracket per mix. This material is so easy to mix, that it probably takes no more than four seconds to mix it. So, we don't consider it to be a time penalty to mix separate portions for each tooth.
DR. GOTTLIEB How do you dispense the ingredients?
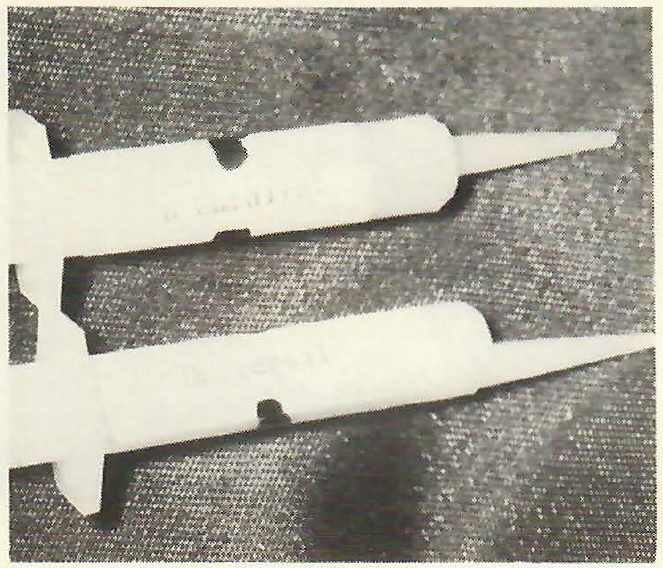
DR. PHILLIPS We dispense the composite from syringes both in the clinic and in the lab. This allows for a great saving in material and it is simply easier to dispense the amount you want where you want it. It wouldn't think of going back to my original containers of A and B paste every time I wanted to put a bracket on. In the same way, the chemist avoids contamination of his supply, by not working out of his master reagent bottle.
DR. GOTTLIEB What's the life of the material in the syringes?
DR. PHILLIPS It's difficult to say, because, in normal use, it exceeds the amount we can put in a syringe. Most of these materials at room temperature are probably good for at least a year.
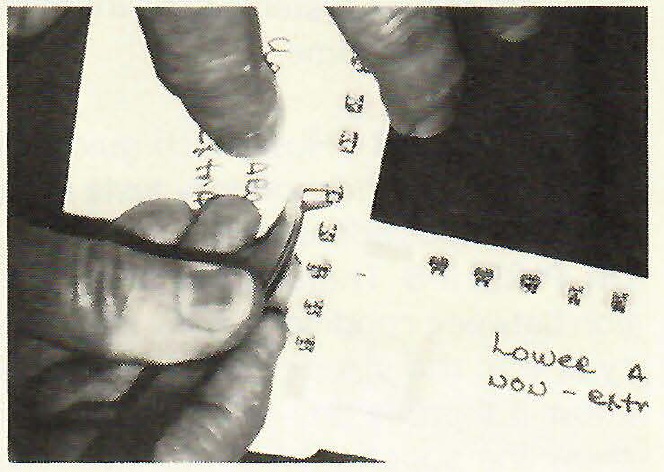
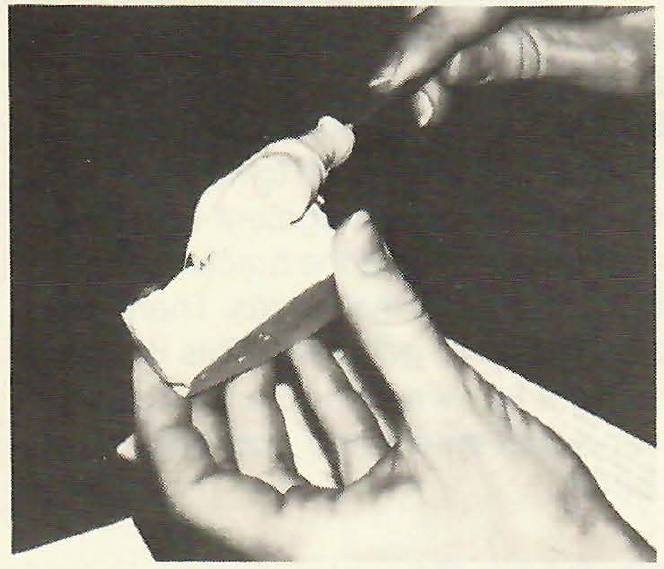
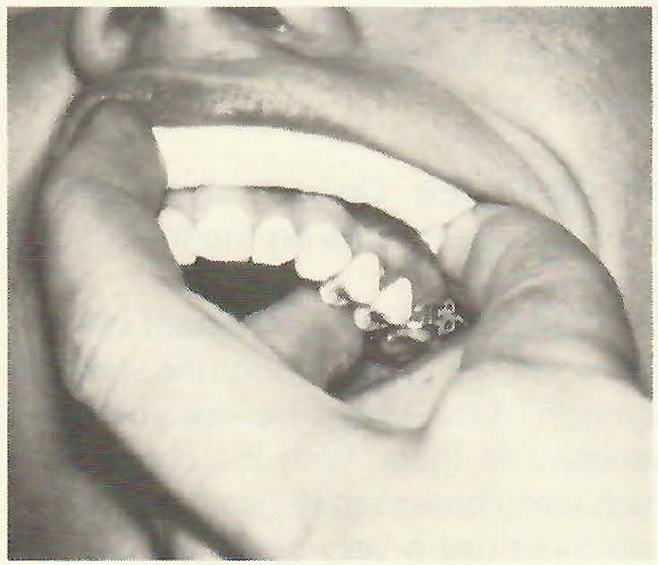
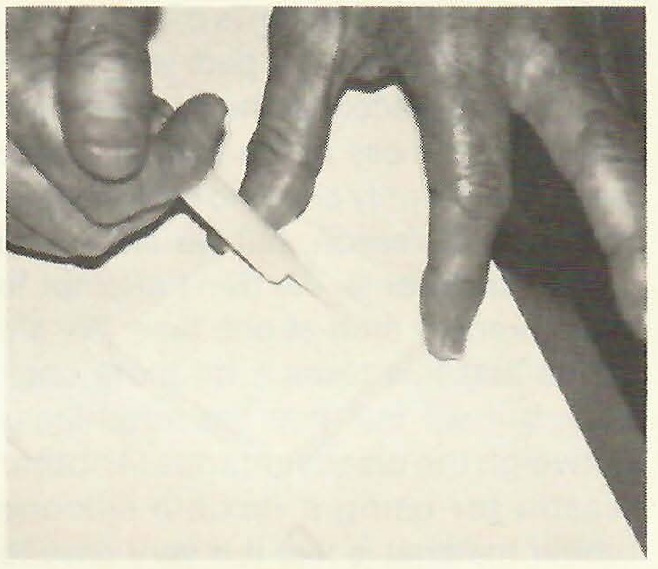
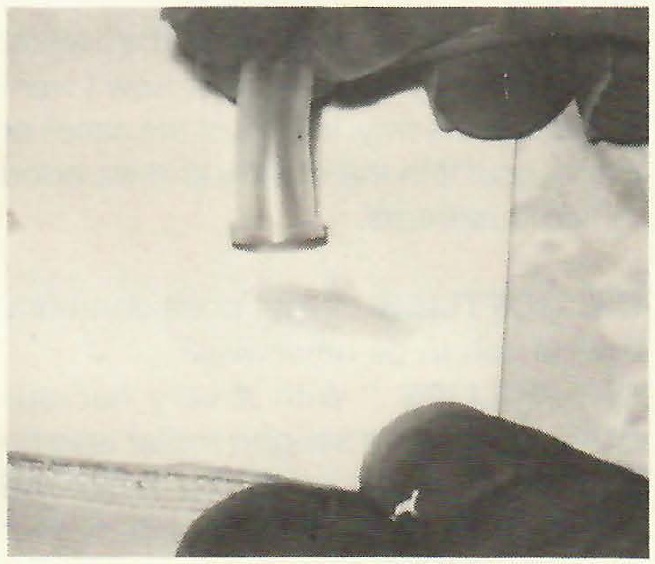
[show_img]391-jco-img-2.jpg[/show_img] Selecting the bracket.DR. GOTTLIEB Do you refrigerate the material anyway?
DR. PHILLIPS Just a matter of good technique, we generally refrigerate the syringes overnight and on weekends. One of the first things we do in the morning, like turning on the lights, is to take the bonding materials out of the refrigerator. They stay out all day and are put back in at the end of day.
DR. GOTTLIEB So, the materials are dispensed out of the syringes until they are used up, and until then you have no qualms about using them?
DR. PHILLIPS None whatsoever. It is just as if we were working out of the jars. Of course, the materials are not mixed in the syringes. We have separate syringes. We usually keep 4 or 5 of each component available at all times, wherever we want to use them.
DR. GOTTLIEB Do you use a bracket placing instrument?
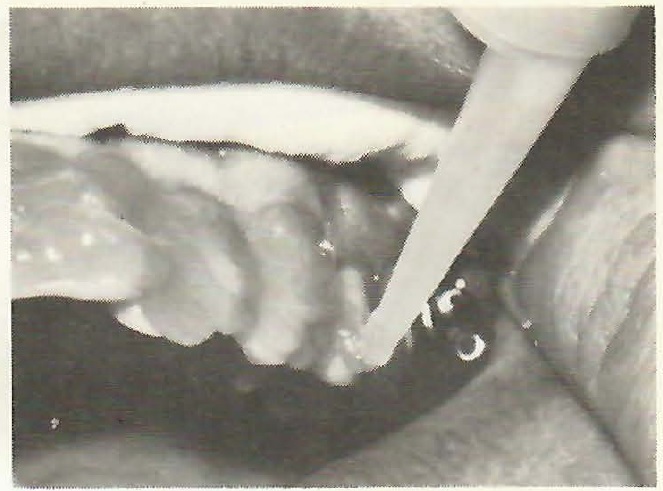
DR. PHILLIPS The basic consideration is to be able to pick up a bracket, to be able to see most of the bracket while it is held in the instrument, and to be able to let go of it without disturbing its position on the tooth. I have yet to find an instrument that works better than a cotton plier for this purpose. I do feel that improvements are possible, but it still needs to be basically that instrument. We have developed an instrument that aids in placement mesiodistally and angularly for tip. You have to decide where you want to place the bracket vertically. It becomes a matter of personal preference whether you measure from cusp tip on posterior teeth and incisal edge on anterior teeth.
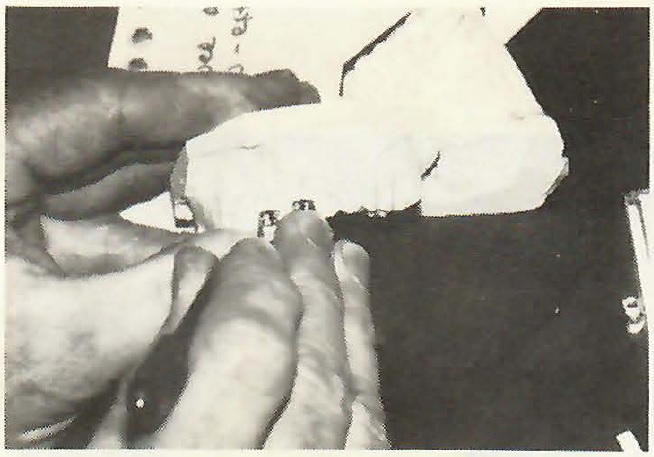
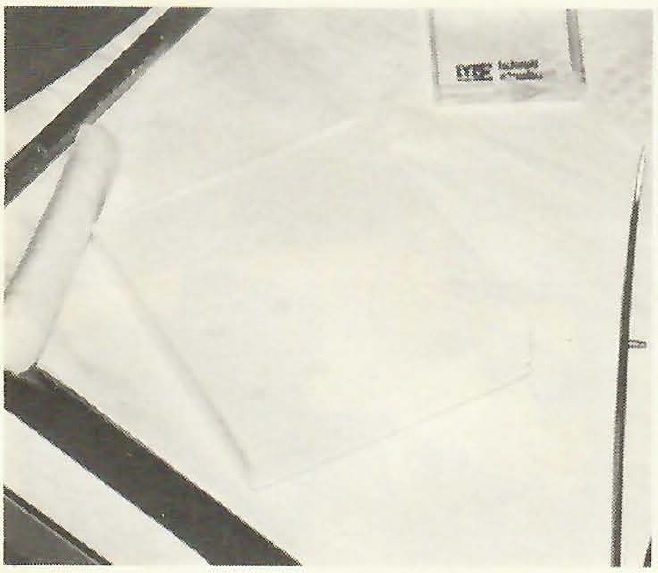
[show_img]391-jco-img-3.jpg[/show_img] Mixing the composite.
DR. GOTTLIEB Do you follow a sequence in bracket placement?
DR. PHILLIPS If you are attempting to get as uniform a placement as possible, I feel you need to start on a maxillary lateral incisor, proceed to central incisors and cuspids, and then bicuspids, going by the tip of the cusp or by the marginal ridges. There are no absolutes, because you have worn cusps and malposed and partially erupted teeth. I really think it gets down to clinical judgment on a tooth-by-tooth basis. I don't see any totally mechanical way that you can place brackets a certain number of millimeters from any landmark and always have them in a good spot.
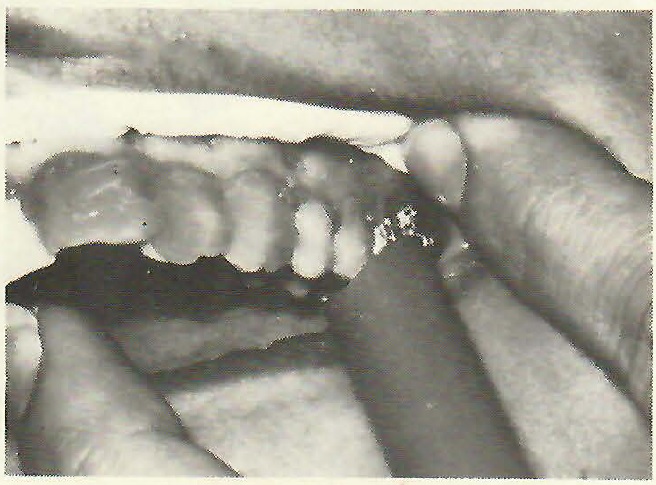
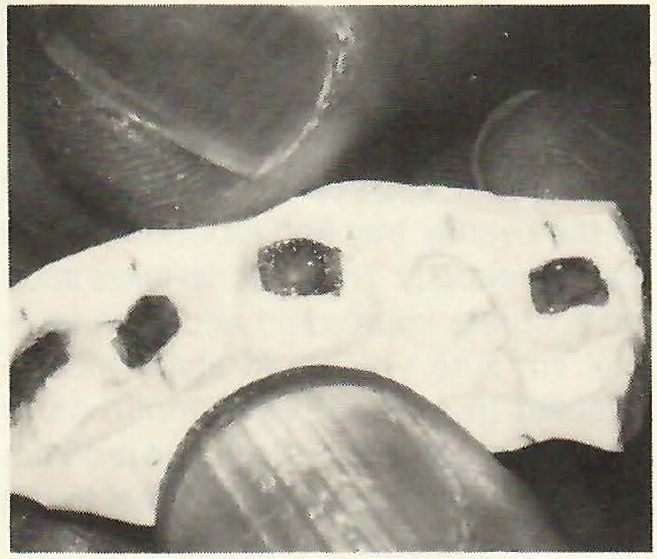
[show_img]391-jco-img-4.jpg[/show_img] Applying the composite to the bracket.[show_img]391-jco-img-5.jpg[/show_img] Positioning bracket on model.
DR. GOTTLIEB We probably should be lining up marginal ridges and adjusting cusps, rather than measuring from cusp tips.
DR. PHILLIPS I would agree with that. It was somewhat easier to do with banding. More clinical judgment is involved in the placement of the bracket alone to line up the marginal ridges. There is no pat formula to get there. This is where being a knowledgeable clinician or technician enters into appliance fabrication.
[show_img]391-jco-img-7.jpg[/show_img]DR. GOTTLIEB You feel there is a greater potential for error in bracket placement with bonding than with banding?
DR. PHILLIPS Although we have a greater potential for error in bracket placement with bonding, we also have greater potential for putting it in an ideal position. If you are dealing with a bracket prewelded to a band you are really pretty limited as to where you can put the bracket, so I think the overall benefit is in favor of bonded attachments, where we have a greater capacity for proper bracket placement.
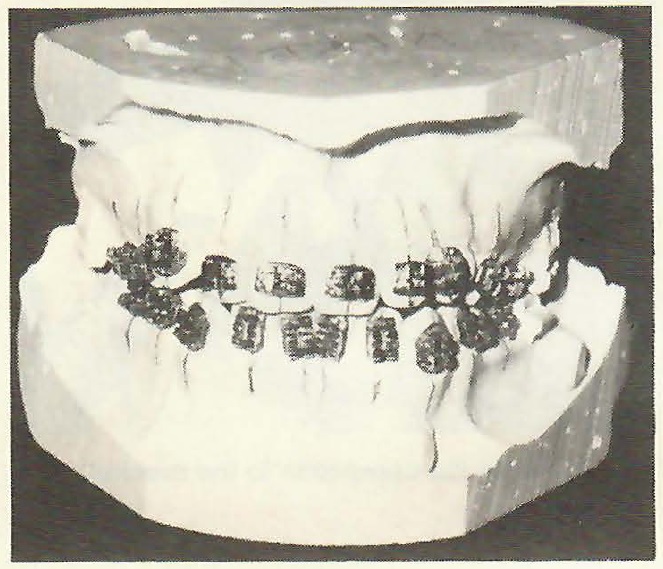
After placement of the brackets on the model in the laboratory with Concise, our next step is to construct a template to transfer the brackets from the model to the mouth.
DR. GOTTLIEB What material do you use for your template?
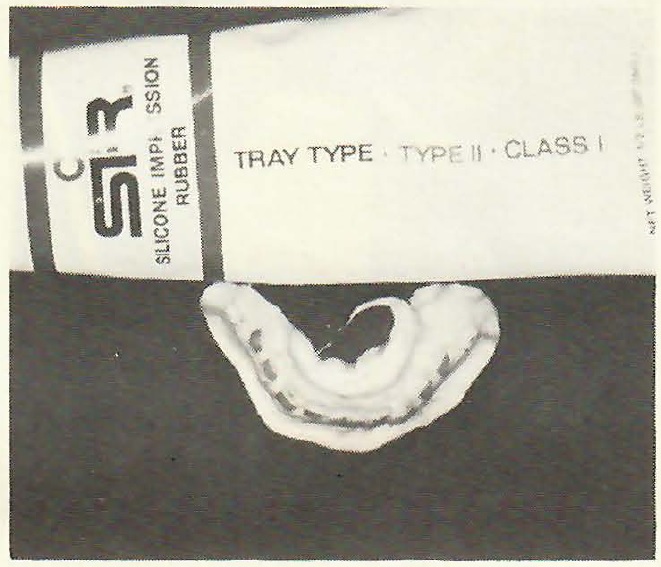
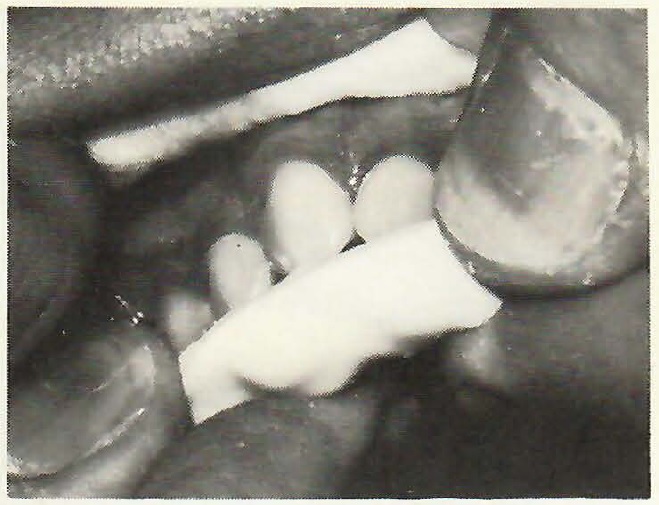
DR. PHILLIPS I want a very accurate impression material that is flexible and stable. The best material I have found for this purpose is a silicone rubber. The particular one I use is Sir tray-type. It is a paste/liquid system. We add more accelerator or catalyst than is called for, because we want it to set faster. We don't want to spend several minutes in the lab waiting for the material to set. The material is spatulated until it has a uniform color, and then it is placed on the model from the lingual to avoid the possibility of knocking the brackets off with the spatula. Incidentally, if you are inclined to prefabricate initial archwires, there is no better time than when the brackets are on the model and before the tray is made.
[show_img]391-jco-img-8.jpg[/show_img] Smoothing surface of the impression material.
DR. GOTTLIEB Do you engage the wire in the brackets?
DR. PHILLIPS You can't actually engage the wires in the brackets, because you may knock themoff the model, but you certainly can hold them right next to the brackets. If we are making a multiloop archwire or a utility archwire, we will often make it in the laboratory before making the tray, and have it ready at the initial bonding appointment.
DR. GOTTLIEB Do you have any tricks in handling or shaping the tray material?
DR. PHILLIPS In mixing the tray material, we use a dishwashing detergent to lubricate our fingers so that we can shape the material without having it stick to our fingers. The rubber is very easy to form and you can take your time. You can make the material set in seconds or minutes, depending on how much accelerator you add and on the proficiency of the operator. It need not take more than a minute.
DR. GOTTLIEB After the tray material has set, how do you remove it from the model?
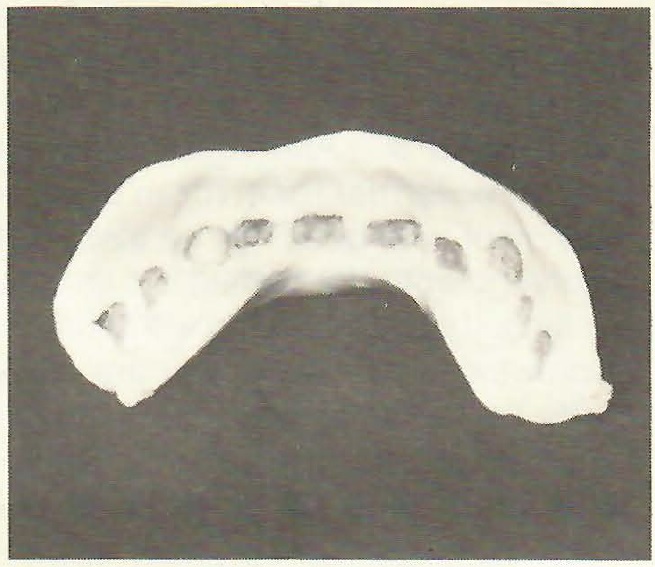
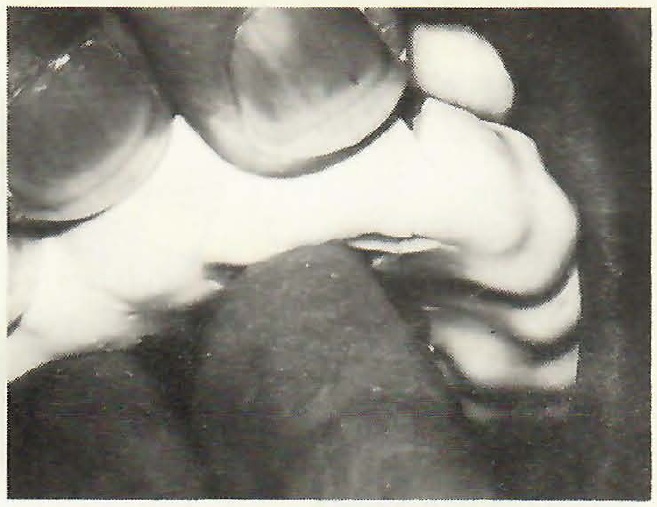
DR. PHILLIPS The tray and brackets together can be removed from the model in two ways. You can simply soak the entire model in water for about ten minutes and the tray will virtually float off; or you can reach under the edge of the silicone rubber with a#7 spatula and pry each bracket off the model. After you have removed the tray from the model, it is trimmed with scissors to the desired shape. The final step is to lightly scour the surface of each bracket pad with a bur in a low speed handpiece, to make sure that there are no contaminants of plaster or separating medium on the bracket base. It has been shown by SEM photographs that if that surface is clean, you can't find the interface between the composite set in the lab and the composite you add at the chair. If you have a layer of plaster there, you are going to have a weak point.
[show_img]391-jco-img-10.jpg[/show_img]DR. GOTTLIEB Do you leave the brackets in the tray to clean the pads like that?
DR. PHILLIPS We leave them in. You can take them out to do it, but we don't feel we need to.
DR. GOTTLIEB Do you bond the full arch tray?
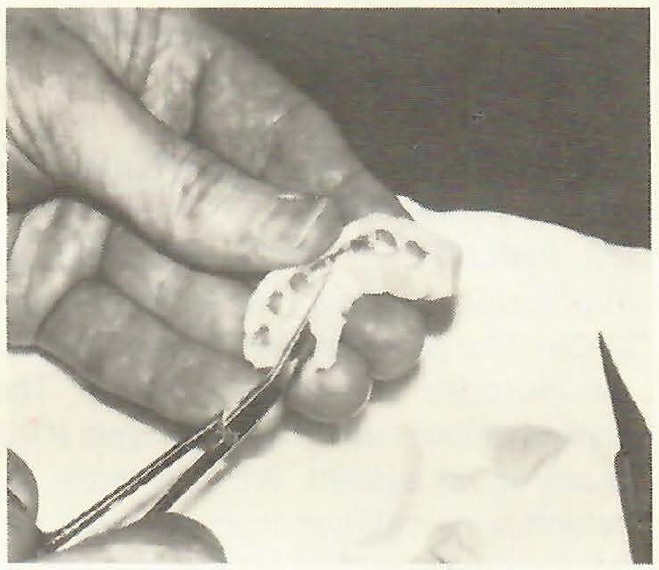
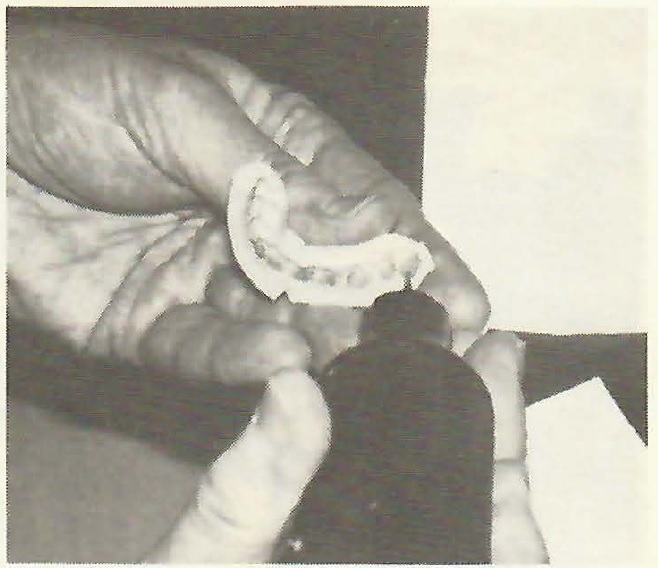
DR. PHILLIPS We do not ordinarily bond a full arch, but at this point the tray is left in one piece. At chairside, I will section it with scissors into quadrants or other segments depending on the occlusion and the patient.DR. GOTTLIEB You make sectional templates as well as full arch ones?
DR. PHILLIPS At any one time in our laboratory there will be from a dozen to fifty sectional impressions with anywhere from one to three brackets each. Whenever we see a tooth that has erupted sufficiently to warrant putting a bracket on it, we take a sectional impression and put the bracket on at the next appointment, unless there is some overriding reason to do it immediately,which is rare. This is easy appliance fabrication, in my view.
DR. GOTTLIEB The biggest bonding problem for many orthodontists is trying to work single replacements into their schedule. Your procedure of taking a sectional impression and replacing the bracket at the next visit doesn't upset your schedule at all.
DR. PHILLIPS Not at all. We do single replacements as easily as we do an archwire change. Wemake no special time available to bond with one of these sectional trays. If we are adding a second molar tube which necessitates an archwire change, we are much more concerned with time for the new archwire than we are with time for bonding the attachment.
DR. GOTTLIEB We have covered the laboratory phase of your technique. Let's get into the clinical phase.
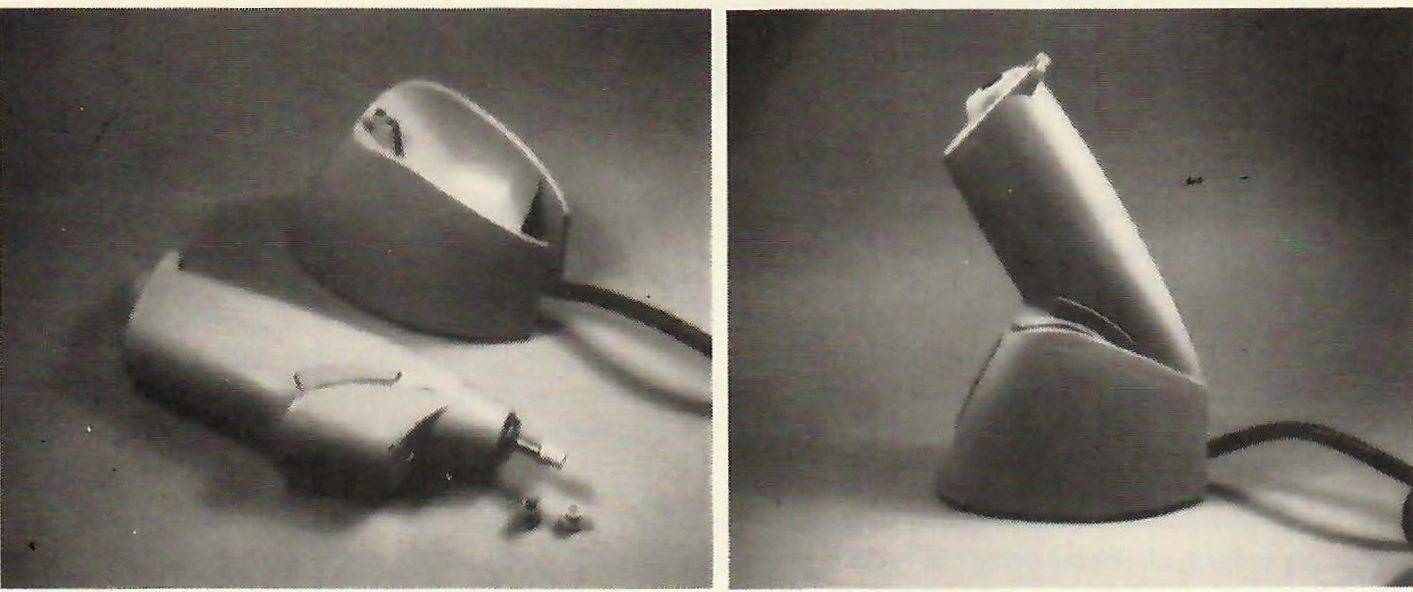
DR. PHILLIPS We start with cleaning the tooth surface very carefully with a rotary prophylactic instrument, using either a brush or a rubber cup with pumice. A prophy angle in a low speed handpiece works very well, but in my practice we usually use a cordless prophy instrument that I call a "Bond-Buddy". It is durable and has a lot of torque.
[show_img]391-jco-img-11.jpg[/show_img] "Bond-Buddy" prophy instrument.
DR. GOTTLIEB Do you have a preference for brush or cup?
DR. PHILLIPS Not really. I know that Dr. Miura showed most excellent enlarged SEM photographs to demonstrate that the brush did a better job. However, many practitioners who are very successful with clinical bonding are using a rubber cup. In an initial bonding with healthy,tight gingiva, a brush is probably the better way to go, based on Dr. Miura's work. If, on the other hand, it is a rebonding or bonding in a mouth with hypertrophic gingiva and a lot of tissue fluid present, I think you are more apt to cause bleeding with a brush than with a cup. In those cases, I would vote for the cup. In any event, using pumice is very important. I have not found it necessary to use a dry flour of pumice mixed only with water. We use a commercially available prophy paste, Zircate, and have found it to be very effective.
DR. GOTTLIEB Removing the pellicle is an important consideration for bonding to teeth that have already erupted.
DR. PHILLIPS Yes, for bonding directly or indirectly, thorough cleaning with a prophylaxis instrument and pumice,prior to etching, is a most important step to remove not only the plaque and other surface debris, but also the pellicle. The pellicle is anywhere from one to a few microns thick. You can't see it, but you have to believe it's there, and that you must scrub it off in order to achieve maximum bond strength. If you don't see a good etched surface, chances are that the problem started with not having the tooth clean before you put the acid on it.
DR. GOTTLIEB At what point do you isolate the teeth?
DR. PHILLIPS Following the cleaning of the surface. It is really very simple, since we are working only in quadrants.
DR. GOTTLIEB What is your procedure for isolating the teeth and keeping the field dry?
DR. PHILLIPS We don't use mouth props. We don't use chemical agents such as banthine or probanthine. We simply use cotton rolls, high speed vacuum, and air. Following pumicing and rinsing, we place a long cotton roll. For example, in the upper arch it extends from the molar area to past the midline. We dry the teeth in that quadrant and place the etchant gel on the teeth from a syringe, and we time it very precisely with a stopwatch. In the lower arch, we do the same thing, with the addition of a lingual cotton roll along with the one on the buccal.
DR. GOTTLIEB There seems to be disagreement and confusion about etching concentrations.
DR. PHILLIPS Well, that's true. You do hear different opinions about etching concentrations, but it has been shown that anything between 30% and 60% concentration of phosphoric acid will provide a good etch within one minute. Less than 30% gives a less effective etched structure, and 80%-90% doesn't give a better etch pattern. You may, in fact, lose more enamel. Most commercial etchants are in the neighborhood of 37% for liquids and 50% for gels, although there are gels that are 35%.
DR. GOTTLIEB There seems to be an effective range. Does the quality of the etch vary within that range?
DR. PHILLIPS Yes, because the enamel varies within the same tooth. It is not uniformly blessed with an equal number of enamel rods, equally parallel throughout. The etched surface can vary by preferential etching of either the core or the periphery of the enamel rods. This is called differential etching. In addition, one part of the tooth may be cleaned better before the etch; the surface might not be uniformly dried; the acid concentration might not be kept uniform on the tooth surface; and the acid may be diluted with saliva, resulting in a weaker solution. These technique variables, plus the basic variability of the biological system you are dealing with, lead to variations in etching patterns.
DR. GOTTLIEB What is the significance of the amount of time that the etchant is permitted to remain on the tooth?
DR. PHILLIPS The amount of time that the etchant remains on the tooth is a very important factor in the creation of a porous enamel surface with optimum retentive qualities for bonding. Too short a time will not allow the differential etching to sufficiently increase the surface area. Too long a time causes a greater loss of enamel structure and the honeycombed surface is not as deep or well-defined as is desired for retention of the adhesive. What is needed is a time frame that is clinically useful about 95% of the time.
One study recommends only a thirty-second etch time and one manufacturer recommends one hundred and twenty seconds of etching. My experience is that thirty seconds is too brief for routinely good etching. Usually, a sixty-second etch for adult teeth and ninety seconds for deciduous teeth provides a clinically useful bonding surface. Teeth with a high fluoride content may require ninety to one hundred and twenty seconds for etching, due to the increased resistance of the enamel surface to acid dissolution.
DR. GOTTLIEB Can there be significant loss of enamel from the etching?
DR. PHILLIPS Silverstone has shown that, on the average, you'll lose about ten microns of the enamel surface with a one-minute etch. The etching penetrates another 20-40 microns into the enamel, although most published photographs show tags in the range of 15 microns. This is simply because they are so fragile and are destroyed in making the specimens that are photographed. But, even prophylaxis results in a loss of enamel surface. I suspect that drinking carbonated beverages does the same thing. The dental profession has been quite comfortable for a hundred years, doing procedures that take away much more enamel than we are talking about with etching. Enamel rods average at least 2000 microns in depth and we are talking about removing 10 or 20. It is really not a concern.
DR. GOTTLIEB The fragile etched surface is one potential source of technique breakdown.
DR. PHILLIPS The operator has to appreciate how fragile that etched surface is, and must be careful not to break it down. Repeated application of liquid acid with a brush, for instance, stands a good chance of breaking down some of that honeycomb structure you have built. I feel that a very much better way to do this is to make a single application of the acid and not touch the tooth again, except with wash water.
[show_img]391-jco-img-12.jpg[/show_img] Applying etching gel with syringe.
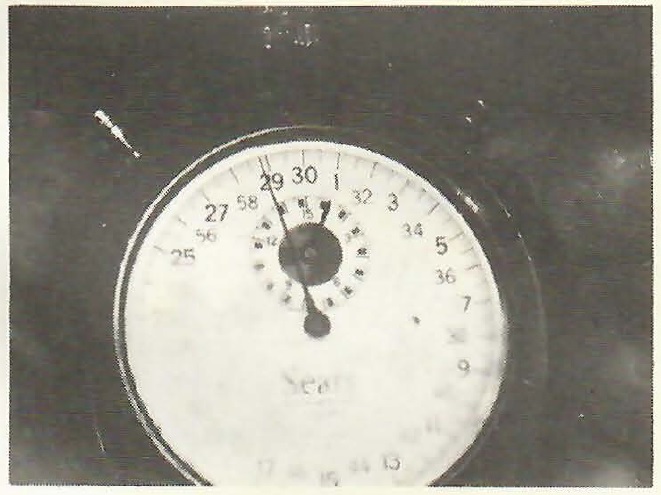
[show_img]391-jco-img-14.jpg[/show_img] Stopwatch timer.DR. GOTTLIEB And you prefer a gel for that.
DR. PHILLIPS Yes.
DR. GOTTLIEB You do not agitate the gel?
DR. PHILLIPS Not at all. We dry the teeth thoroughly before placing the gel, to avoid diluting the acid. Then we apply the gel from a syringe and don't touch it again. In fact, after one minute, which we time with a stopwatch, we remove most of the gel with high speed vacuum before we even put water there. Then we rinse off the rest of it and we never touch the tooth again until a sealant goes on.
[show_img]391-jco-img-15.jpg[/show_img] Removing bulk of gel with suction.
[show_img]391-jco-img-16.jpg[/show_img] Rinsing with water.
DR. GOTTLIEB Are you concerned about the gel getting on the gingival tissue?
DR. PHILLIPS No, we're really not, based on our clinical experience. We found that a 37% liquid acid did cause discomfort and irritation to the gingiva. With the gel, we consider it improper technique if we don't get it on the gingiva, because we want to have total coverage of the facial aspect of the clinical crown. If we can see any of that tooth surface at all, we feel we haven't placed gel everywhere it needs to be. We make a point of putting the tip of the syringe in the interproximal, making sure we get the gel as far interproximal as we later will expect to get the sealant.
DR. GOTTLIEB Of course, someone who was not using a sealant would not have to cover the entire tooth surface with etchant gel or liquid.
DR. PHILLIPS That's quite true. You can place the gel quite accurately with the syringe only where the bracket pad is going to be. That's one of the beauties of dispensing a gel from a syringe.
DR. GOTTLIEB How much time do you allow for etching?
DR. PHILLIPS For adult teeth, we etch routinely for 60 seconds. For deciduous teeth, we etch 90 seconds. Exceptions to this are for teeth that were formed in very high fluoride areas, which we have to etch 90 or even 120 seconds.
DR. GOTTLIEB Which gel do you use?
DR. PHILLIPS It's TP's Direct-On gel. It is not only highly visible due to its color, but it stays where you put it until you wash it off or take it off with a vacuum. We pull the gel off with a vacuum tip and then rinse with water from a syringe, with most of the water going directly into the vacuum tip. The next step is drying.
DR. GOTTLIEB Would you describe exactly how you dry the teeth, since dryness is one of the most critical points in the process?
DR. PHILLIPS Yes. Drying the enamel is not as simple as it may seem. In my technique, we use the high speed suction before we start drying the teeth with air; and the first thing we dry is not the teeth, but the cotton roll. Cotton rolls are designed to absorb water and indeed they do. So, first we dry the cotton roll with the vacuum and then we dry the teeth with the vacuum tip. This eliminates most of the rinse water. Then we use a warm air drying instrument and we continue to use the vacuum tip while we are using the tooth dryer. The vacuum aids in rapid drying.
DR. GOTTLIEB What precautions do you take to assure oil-free, moisture-free air?
DR. PHILLIPS If you have fairly modern equipment, you probably have a compressor that gives relatively oil-free air and has a dryer and filter on it. If you do not, or if you live in a moist climate, you may have moisture in the air line. For that reason and because warm air has more drying effect per unit of time than room temperature air, I recommend the use of a dry, warm air source. We use a unit developed for that purpose, the Penguin Tooth Dryer, with which we can dry each tooth individually if we wish. It provides a temperature of about 115º F. and the volume of air is sufficient for rapid drying, but without the harsh pressure of many air syringes.
[show_img]391-jco-img-17.jpg[/show_img] Drying cotton roll with vacuum. [show_img]391-jco-img-20.jpg[/show_img]DR. GOTTLIEB Are those pellets generally available?
DR. PHILLIPS They come in the Concise kit, but any component of the kit, including the pellets, can be bought separately.
DR. GOTTLIEB Do you put sealant on the bases, as well as on the tooth surfaces?
DR. PHILLIPS A very important step in indirect bonding is to reduce the surface tension of the bases before you add adhesive to them. With the change to such small bases as we use these days, you must use a very small amount of adhesive if you want to avoid a lot of flash. So, you put a dab of either the A or B half of the sealant system onto the base. It doesn't matter which one, since it is not going to polymerize. It is just used to wet the surface so that when you add the new adhesive to it, the adhesive flows better and does not leave voids. Working with a bare pad or mesh base, you have to use a lot more material. Here we want just a minimum of material, but we want it spread evenly, and we are reducing the surface tension to make that possible.
DR. GOTTLIEB Do you prefer these systems because you like the strength of the composite and need the sealant to wet the surface?
DR. PHILLIPS To my knowledge, Concise is the only two-part self-polymerizing Bis-GMAadhesive where the manufacturer's instructions allow varying the proportion of the A and B components to vary the setting time. I prefer this method of timing and think it is a more positive one than others which recommend that they be mixed only at a one-to-one ratio with the setting time controlled by temperature. I can't really know what the temperature is, except that it is changing all the time. For example, something brought out of the refrigerator is getting warmer all the time and approaching room temperature. I like to time things precisely and to know precisely what working time I have for the proportions I use. This is one reason I like the Concise system. Another reason is that it is easier to mix than some of the others, and it is possible to vary the viscosity of the mix by adding unfilled resin to it. You can add one part of A and one part of B paste and then add another part of A liquid or B liquid and reduce the viscosity, if that is what you care to do.
DR. GOTTLIEB How do you decide that?
DR. PHILLIPS On an anterior tooth, I don't feel that I need the absolute maximum strength I can get from the adhesive. So, I will dilute it, which gives a lower percentage of filler and a slightly weaker system. This makes for a slightly easier debonding procedure. I also dilute it in order to have the material flow very readily on the bracket pad in the chairside portion of the procedure. I like to use a very small quantity of material that will flow evenly over the whole pad. A relatively viscous or dense material will not spread out evenly. Those are the reasons that I use that particular system.
DR. GOTTLIEB If you control the viscosity, why use a sealant?
DR. PHILLIPS I feel that the lower viscosity sealant probably penetrates the enamel more readily than the thicker material and this is why I use it. Also, perhaps there is some increased resistance--albeit perhaps a minimal one--to decalcification if you cover the entire facial surface with sealant, following etching the entire surface, of course.
DR. GOTTLIEB You have to use a relatively thick layer of sealant, don't you?
DR. PHILLIPS The Bis-GMA type sealants in self-polymerizing form that are available to us will not cure in a continuous surface in thin layers in the presence of oxygen. It will simply wash off the tooth surface after the bonding procedure is completed. There may be a little spot here or there, but not a layer of sealant on the tooth. However, if you use a UV cured system, such as Nuva-seal, there is a continuous layer of sealant. Of course, we all know that this layer abrades away with just normal toothbrushing. However, there is no question that it affords protection to the tooth until it abrades away.
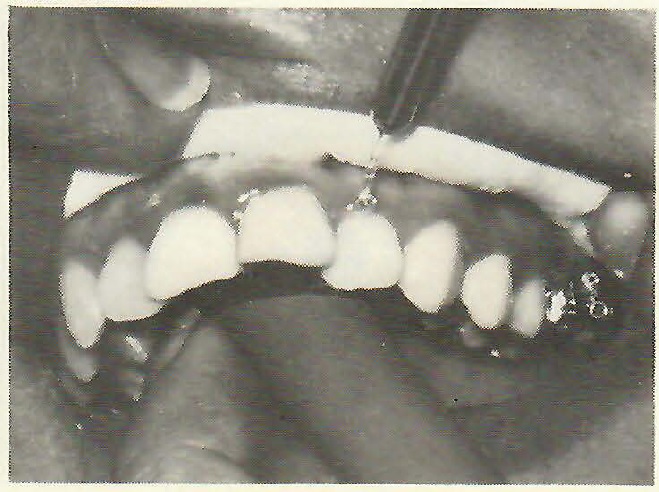
[show_img]391-jco-img-22.jpg[/show_img]DR. GOTTLIEB Do you feel you get better pressure with the silicone rubber tray than others do who use harder plastic materials?
DR. PHILLIPS Many of those who use an indirect bonding technique prefer a much stiffer tray than I do. They feel that it gives a more positive seating of the appliance. But, I am concerned with the path of insertion of the tray to avoid smearing the adhesive at the time of placement. You can do everything else right--proper amounts of adhesive, properly placed on the pad, with bracket, properly placed on the model--and still make a mess at the time of placement. We not only prefer to use a flexible tray for that reason, but we also bond only in quadrants. We don't attempt to seat an entire arch at one time. We are aware that this takes a bit more chair time, but we feel that the advantages outweigh the disadvantages. Another reason for using a flexible silicone rubber material is that it is very easy to section the tray with a pair of scissors anywhere you want to. The first time I see the tray is on a model at chairside and it is in one complete arch form at that time. At that point, with the patient there, I make the decision of how I want to section the tray. In 90% of the cases or more, I cut it in the middle and we bond in two quadrants.
DR. GOTTLIEB What considerations decide you to do otherwise?
DR. PHILLIPS With a very nervous patient or when a second molar is to be bonded or in the case of a malposed upper second bicuspid--situations that are somewhat unusual--we don't hesitate to cut the tray so that we may bond as few as one tooth at a time. Also, with the best technique we can manage, we sometimes don't get the bracket exactly where we want it. If one bracket does not bond properly, we can simply cut off that portion of the tray, take another bracket, pop it into the segment of the overlay tray and rebond that one tooth indirectly. The material takes such an accurate impression and is so flexible, I'm sure you could literally put a bracket in and out of it hundreds of times very accurately. So, it's no problem to redo one if you need to. I feel that a template material[show_img]391-jco-img-23.jpg[/show_img]
DR. GOTTLIEB Is it that accuracy that makes you confident that you are going to seat it correctly each time and that you don't need a clear material to check the seating?
DR. PHILLIPS That's right. In my experience, the transparent vinyl materials are not really adequate for bonding because of their hardness and their lack of stability. I think the only viable reason for a transparent tray is if you are using a light-cured system. With a self-curing adhesive I see no need for a transparent tray. There is no need to see the teeth through the tray, I see where the tray fits on the model and where the cut surface is in relation to the central incisor, and that's where I put the tray in the mouth. I flex the tray to bring the bracket bases directly against the teeth without smearing the adhesive. Then I personally hold the tray until the material sets, timing it with a stopwatch. I hold it very carefully, using two hands, with one or more fingers along the occlusal and two or three fingers on the facial, I can feel that it is place and I know that it stays in place until the material sets; and you learn that if you have one tooth in the quadrant that is, say, a little malposed to the lingual, you put a little extra finger pressure at that point to be sure that the bracket pad contacts that tooth surface.
DR. GOTTLIEB You hold the tray yourself?
DR. PHILLIPS I feel that it is very important at the beginning stage of the doctor-patient relationship, that the patient knows that I am involved. They are aware that I am sitting beside them and holding something in their mouth, that I am involved in their treatment. So, I don't feel that it is wasted time for me to spend the few minutes involved in positioning the trays and holding them in place until they set, although I could delegate that responsibility.
DR. GOTTLIEB For how long is the tray held?
DR. PHILLIPS From the time that I begin mixing the material on the pad until I let go of the tray is 2½ minutes, timed with a stopwatch. We could do it much faster, but I am looking for a systemthat works day in and day out, not just when everything is going exactly right. This method allows time for all sorts of accidents and interruptions--if a spatula is dropped or a phone message is delivered. I routinely have extra time available without making the bonding an unduly long procedure. It takes about 50 seconds from the initial mix until I place the tray on the teeth. The rest is reserve time, so I am almost never in a rush.
DR. GOTTLIEB How much time does it take all together to bond an attachment with your indirect technique?
DR. PHILLIPS The entire procedure from seating the patient, through cleaning the tooth, etching, and placing and removing the tray takes about ten minutes. My own involvement in the procedure is closer to four minutes. Of course, dental practice acts vary from state to state. Since we have a fairly stringent law in my state, I must do more of these procedures than many of my colleagues in someother states where auxiliary personnel are authorized to do much more. I really don't mind doing these things and, indeed, I shouldn't. I feel that I owe the patient a certain amount of my time. It is very easy to do and we are not in a hurry.
(CONTINUED IN NEXT ISSUE)