Many orthodontists still use real plaster study casts rather than virtual computer images. These models are usually stored in boxes on shelves in or near the treatment area, at least as long as patients are inactive treatment.
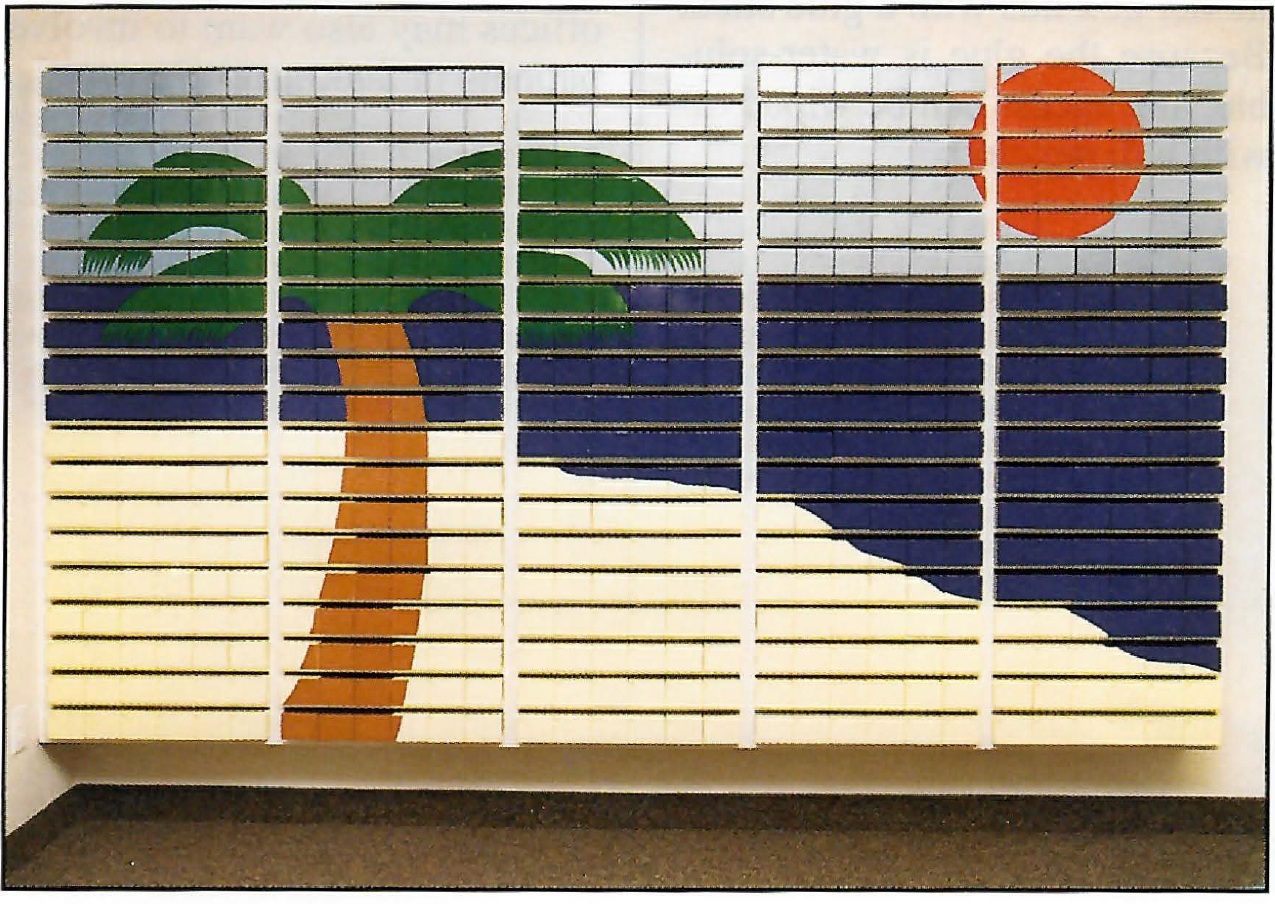
Model boxes can be bought with lids covered in glossy art paper in a multitude of colors.* Some clinicians have arranged the colored box lids in geometric patterns to add visual appeal to their shelves. By cutting out and applying paper of other colors to the box lids, however, it is possible to turn them into artistic designs that are not limited to straight lines (Fig. 1) The technique is as follows.
Preparing the Design
First, determine the number of model boxes to be stored and the dimensions of the shelving system in rows and columns.
Second, create a table with the same number of rows and columns on a computer word-processing program, so that each rectangle represents a model box. Print out the table.
Similar articles from the archive:
- Holographic Storage of Dental Casts May 1990
- A Coordinate System for Model Storage September 1985
- PEARLS Model Drying Unit September 1981
Using the color chart from the box manufacturer and matching colored pens or pencils, draw a graphic design or picture over the printed table. Some rectangles will include two or more colors, depending on the design. This colored-in table becomes the design template.
Next, count the number of rectangles for which each color takes up the majority of space in the rectangle. This will be the number of boxes to order in each particular color. Estimate the number of additional sheets of glossy paper that will need to be ordered for cutting out the smaller sections of each color (allowing for a surplus in case of mistakes).
Arranging the Model Boxes
Referring to the design template, set up the boxes on the shelves according to their major colors. Cut out rectangles of plain paper with the same dimensions as the box lids, and lightly tape one of these rectangles to each box that will have more than one color.
Sketch the design from the template on the attached pieces of plain paper. Remove the pieces of paper one at a time, and cut them into patterns according to the sketched lines. Use each of these patterns to cut a piece of the same shape out of the appropriate colored sheet.
Apply the cut pieces of colored paper to the appropriate model box lids with a glue stick. Because the glue is water-soluble, any excess can be wiped off with a damp cloth.
Conclusion
Many attractive designs, including the one pictured here, can be created using this method. The only limitation is the staff's imagination and the time and effort they are willing to spend on the project. Some offices may also want to involve patients in their artwork.
FOOTNOTES
- *Northwest Paper Box Manufacturers Inc., 5617 N. Basin Ave., Portland, OR 97217.
-
 DR. KAPLAN
Dr. Kaplan is in Private Practice, 1790 Liberty St. S.E., Salem, OR 97302, www.kaplanortho.com.