Simplified Repositioning Splint Construction
Full-coverage acrylic splints with mutually protected occlusion are used in treatment of temporomandibular disorders and in other therapies. However, orthodontists have been concerned about the time-consuming and potentially harmful use of methyl methacrylate cold-cured resins in the construction of these repositioning splints. Reported health problems have included headaches, contact dermatitis, nausea, and cardiac arrhythmia.1-6
Triad* material, used to fabricate custom trays, denture bases, orthodontic retainers, and other removable appliances, has a virtually unlimited working time and contains no methyl methacrylate monomers. This article describes how to use the Triad material to fabricate a precise functional occlusal splint.
Technique
Mount the original patient casts on a Panadent articulator**, according to the powerbite technique with facebow transfer as shown by Roth.7 The articulator will allow the lateral and protrusive movements needed to construct the splint.
Trim a duplicate maxillary cast as much as possible without cutting away the palatal area. Thermoform a 125mm sheet of .040" Essix*** material over this duplicate cast (Fig. 1).
Similar articles from the archive:
- Glass Ionomer Orthodontic Splints February 1996
- Gnathological Orientation Splint for Presurgical Orthodontics February 1993
- Splint for Controlling Vertical Position in Maxillary Osteotomies July 1990
Trim the Essix material with a heated No. 7 wax spatula to avoid torquing and deforming the material upon removal from the cast (Fig. 2). This method produces a clean cut, without irregular edges that could be uncomfortable to the patient.

Fig. 1 Sheet of Essix material ready for thermoforming over duplicate maxillary cast.
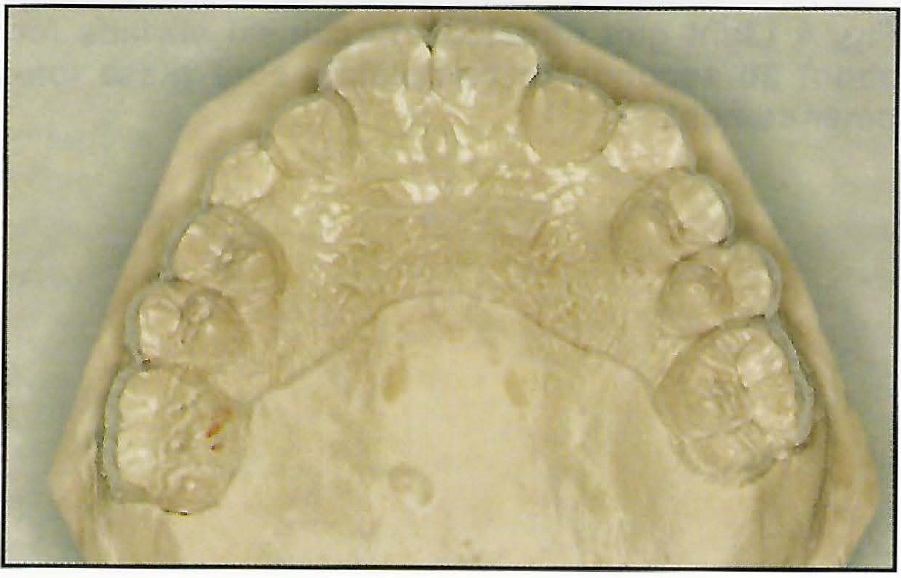
Fig. 2 Properly trimmed thermoformed material on maxillary cast.
Place the template over the original maxillary cast mounted in captured centric relation on the articulator. Paint the Triad bonding agent over the template's alveolar ridges and over the occlusal surfaces. Open the Triad VLC transheet (colorless), which comes in a trapezoidal flat sheet, and mold it into a roll approximating the archform. Place this roll over the arch on the cast, and contour it to be smooth enough for patient comfort (Fig. 3).
Apply petroleum jelly to the occlusal surfaces on the mandibular cast to prevent the transheet from adhering to those teeth. Close the articulator, and trim away any excess Triad material. Using a hand-held curing light, spot-cure each tooth for 10 seconds from the buccal and 10 seconds from the lingual (Fig. 4). The lingual curing must be done from the back side of the articulator, since the articulator should not be opened until spot-curing is completed (Fig. 5).
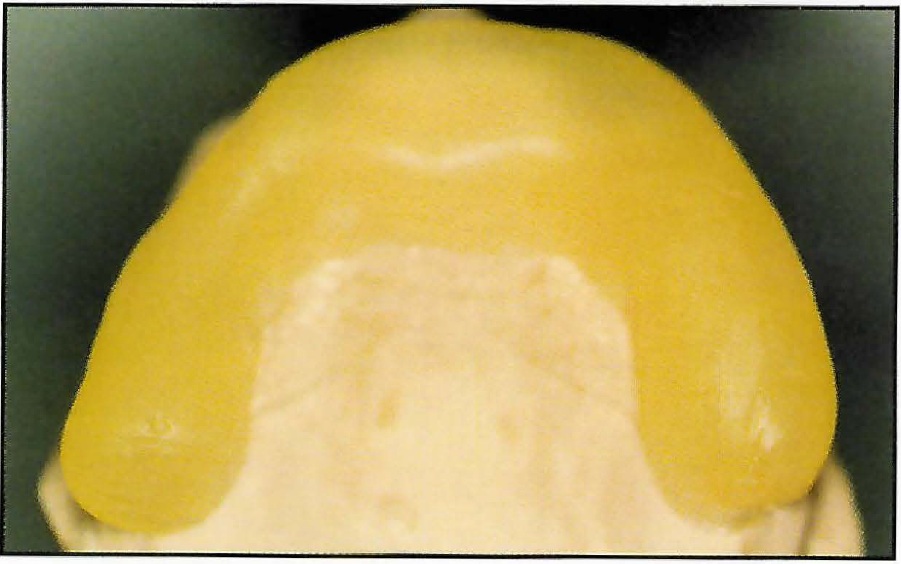
Fig. 3 Triad material rolled into archform.

Fig. 4 Spot-curing of buccal surfaces with handheld light gun.
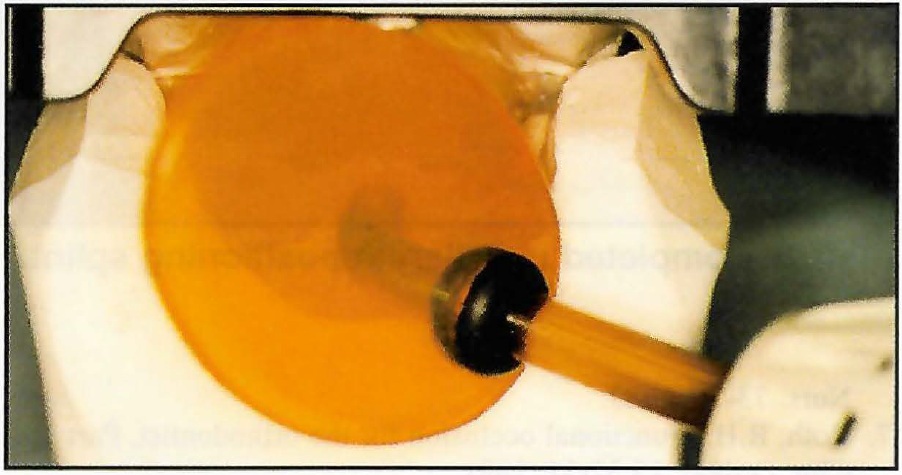
Fig. 5 Spot-curing of lingual surfaces from back of articulator.
Remove the maxillary cast with the splint from the articulator, and insert it into the Triad machine for five minutes of curing. Remove the cast and splint, apply Triad air barrier coating, and cure the unit again for one minute in the machine (Fig. 6).
The anterior guide ramp should be built at a 45° slope to the occlusal plane. It can be formed from leftover Triad material or from another sheet, before or after curing of the initial posterior stops. If the ramp is added after the initial curing, the splint must again be cured for five minutes, painted with the air barrier coating, and recured for one minute to ensure proper hardening of the occlusal indentations.
The grinding needed to produce a mutually protected occlusion is described by Roth8 (Fig. 7). This involves removing the anterior contact points in centric relation, and the posterior contact points in lateral and protrusive movements.
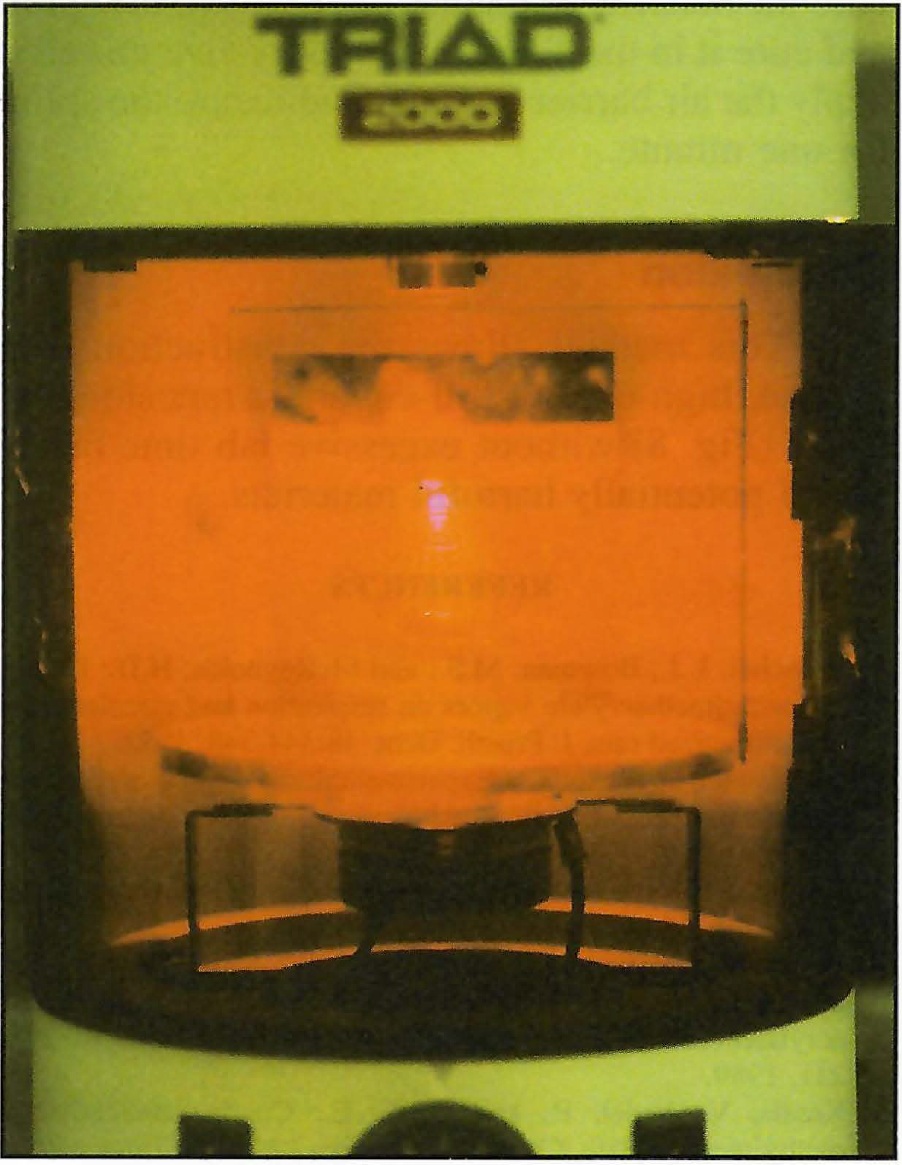
Fig. 6 Final curing in Triad machine.
When the repositioning splint needs to be relined, there is no need to expose the patient to methyl methacrylate. Check the splint with articulating paper, and grind it down or add new material as appropriate. If new material is needed, apply the Triad bonding agent and add a thin layer of transheet where necessary. Guide the patient into the new centric relation, and spot-cure the material in the mouth. Remove the splint and cure it in the Triad machine for five minutes, apply the air barrier coating, and recure the splint for one minute.
Conclusion
This method allows the construction of a precise, high-quality full-coverage repositioning splint (Figs. 8A, 8B) without excessive lab time or the use of potentially harmful materials.
FOOTNOTES
- *Trademark of Dentsply International Inc., York, PA 17405.
- **Panadent Corporation, 22573 Barton Road, Grand Terrace, CA 92324.
- ***Trademark of Raintree Essix, Inc., 1069 S. Jeff Davis Parkway, New Orleans, LA 70125.
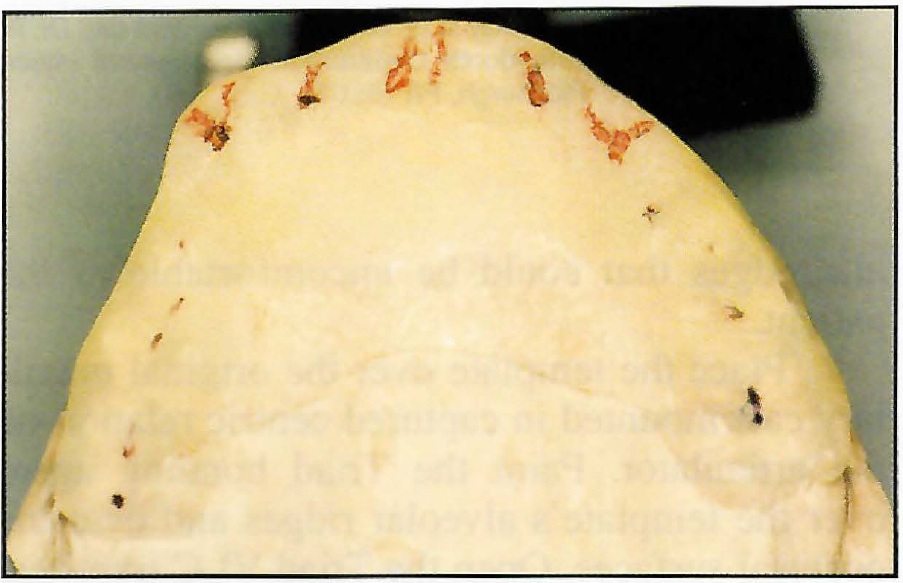
Fig. 7 Anterior guidance and posterior tooth contacts in mutually protected occlusion.
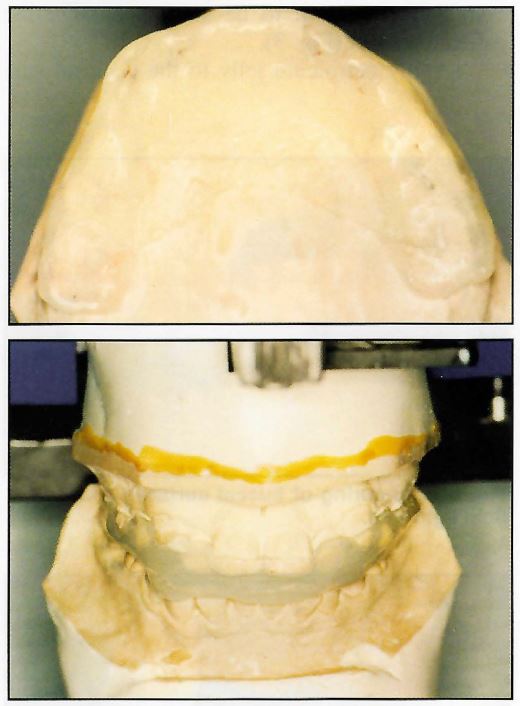
Fig. 8 Completed maxillary repositioning splint.
REFERENCES
- 1. Blanchet, L.J.; Bowman, M.S .; and McReynolds, H.D.: Effects of methylmethacrylate vapors on respiration and circulation in unanesthetized rats, J. Prosth. Dent. 48:344-348, 1982.
- 2. Danilewicz-Stysiak, Z.: Experimental investigations on the cytotoxic nature of methylmethacrylate, J. Prosth. Dent. 44: 13-16, 1980.
- 3. Hardie, J.: Methylmethacrylate- is it safe? J. Can. Dent. Assoc. 7:504-506, 1985.
- 4. Kanerva, L.; Estlander, T.; and Jalanki, R.: Allergic contact dermatitis from dental composite resins due to aromatic epoxy acrylates and aliphatic acrylates, Contact Dermatitis 20:201-211, 1989.
- 5. Kassis, V.; Vedel, P. ; and Darre, E. : Contact dermatitis to methylmethacrylate, Contact Dermatitis 11 :26-28, 1984.
- 6. Mattia, M.A.: Anesthesis gases and methylmethacrylate, Am. J. Nurs. 73-76, 1983.
- 7. Roth, R.H.: Functional occlusion for the orthodontist, Part 1, J. Clin. Orthod. 15:32-51 , 1981.
- 8. Roth, R.H.: Functional occlusion for the orthodontist, Part 2, J. Clin. Orthod. 15:100-123, 1981.
-
 DR. BRADY
 -
 DR. PELLE
Dr. Brady is an orthodontic resident and Dr. Pelle is Acting Chairman, Orthodontic Department, University of Pittsburgh, 3501 Terrace St., Pittsburgh, PA 15261.