Invisible Retainers
The invisible retainer of Ponitz1 can be used either at the end of orthodontic treatment or as a transitional retainer between certain stages of treatment. For example, a phase of fixed appliance therapy to align the dentition and eliminate dental compensations often precedes an orthopedic phase of treatment (e.g., Frankel appliance, Herbst appliance) or an orthognathic surgery procedure. If a functional appliance is to be used, the teeth must be held in their new positions during appliance fabrication so it will fit at the time of delivery. A quick and inexpensive temporary retainer is desirable during this interim period.
The invisible retainer is simple to construct, easy to deliver, and inexpensive. In addition, when the invisible retainer is used as a finishing appliance, minor changes in tooth position can be made on the work model prior to appliance fabrication. When the appliance is used as a transitional retainer, the model is not altered prior to appliance fabrication.
Appliance Construction
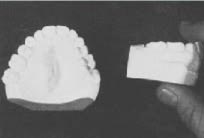
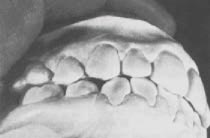
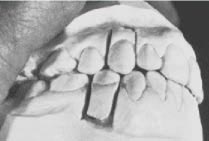
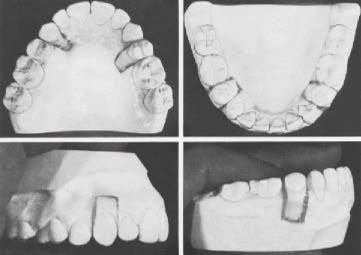
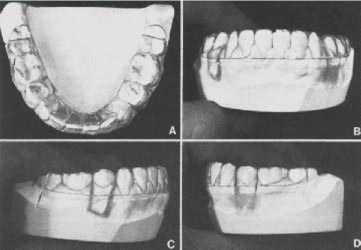
Alginate impressions are taken of the upper and lower dental arches, using standard aluminum trays, and a wax bite registration is taken to articulate the models. After the models are poured and trimmed (Fig. 1), they are occluded with the wax bite in place, and the backs are trimmed flush. The wax bite is then removed, and the models are occluded and checked for any rotations or other dental irregularities (Fig. 2).
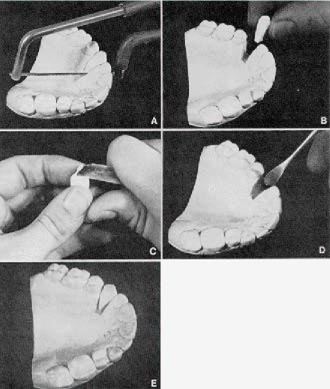
To reset the irregular teeth, interproximal cuts approximating the long axis of the tooth are made in the maxillary work model with a laboratory saw (Fig. 3A), and gentle finger pressure is used to fracture the remaining plaster and free the tooth from the model (Fig. 3B). A laboratory knife is then used to trim the area of the model in which the tooth is to be repositioned. Stone must be removed from the sides of the tooth-- to permit rotation correction-- and from the base (Fig. 3C). Medium-hard pink wax is melted and placed into the area where the tooth has been removed (Fig. 3D), and the tooth is temporarily repositioned in the wax (Fig. 3E).
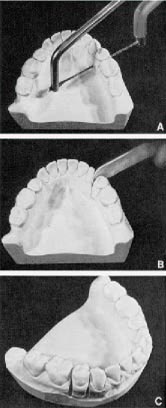
The same procedure is carried out in the lower arch (Fig. 4), in this case using a laboratory knife to apply pressure (Fig. 4B). The models are then occluded, and the teeth to be reset are repositioned as ideally as possible (Fig. 5) and waxed in place. The wax contours are smoothed (Fig. 6).
The clinician is usually limited to resetting only one tooth per quadrant. In the case illustrated, the upper and lower second premolars on the left side were also repositioned. We have had good success in repositioning premolars, canines, and incisors, but only limited success in repositioning the upper and lower permanent molars.
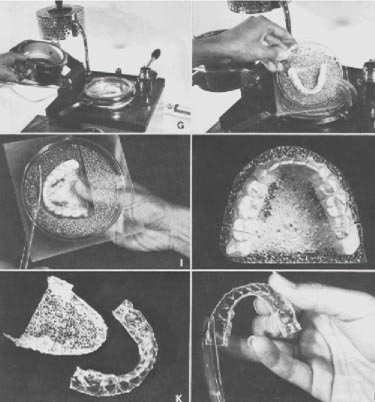
A Biostar positive pressure thermal forming machine (Great Lakes Orthodontic Products) is used to fabricate the invisible retainer. The work model is placed into the large (125mm) model holder. Lead pellets are placed around the model to a point 1mm below the desired margin of the appliance
(Fig. 7A,B).
The holding frame is placed on the pressure chamber with the gasket and the four holding pins facing upward. A piece of 1mm splint Biocryl is placed inside the four pins of the holding frame (Fig. 7C). The Biocryl is secured in position by placing the clamping frame over the holding frame, making certain that the material remains properly aligned within the four pins. The handle of the clamping frame is turned to the left and secured with light pressure to lock it in place (Fig. 7D).
The heating element is moved into position over the pressure chamber (Fig. 7E) and left in place for approximately 30 seconds to soften the splint Biocryl. The heating element is removed, the pressure chamber is rotated over the model holder (Fig. 7F), and the pressure chamber handle is engaged. Air pressure, rather than partial vacuum pressure as advocated by Ponitz, is used to push the softened Biocryl onto the work model.
After two minutes, the pressure chamber handle is unlocked and the pressure chamber is rotated out of position (Fig. 7G). The clamping frame is removed and the Biocryl with the embedded work model is taken off the Biostar (Fig. 7H). Excess Biocryl is removed from the work model with a sturdy pair of scissors (Fig. 7I), and the general contours of the invisible retainer are established with a carborundum disc (Fig. 7J,K). A pair of scissors is used for the final finishing of the appliance (Fig. 7L). No further polishing or trimming is usually necessary, although a light sanding, pumicing, and polishing of the edges of the appliance may be required.
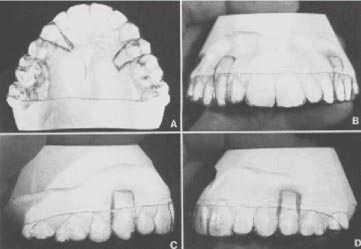
It is important to always cover at least part of the last molar in each arch to prevent extrusion of these teeth with full-time appliance wear. The maxillary invisible retainer is usually trimmed to include full palatal coverage (Fig. 8A). The facial surface of the appliance is trimmed to follow the approximate contour of the gingival margin (Fig. 8B-D).
The mandibular invisible retainer is trimmed in a horseshoe shape, again covering the last molar (Fig. 9A). The facial and lingual surfaces are trimmed to approximate the gingival margins (Fig. 9B-D). Invisible retainers require virtually no adjustment at the time of delivery, except for the trimming with scissors in the area of tissue impingement. Often invisible retainers can be mailed to the patient with instructions to trim the acrylic at any point where it causes irritation.
If teeth have been reset in the invisible retainer, the patient should be told that the appliance will take a few hours to a few days to seat in place. If too much tooth movement has been carried out on the work model or more than one tooth per quadrant has been reset substantially, the appliance may never fit and will have to be remade.
Retention Sequence
Invisible retainers are only one part of routine retention procedures, which in the senior author's practice include the following sequence:
periodontal surgical procedure is evaluated and the procedure is performed if needed. Such procedures enhance the stability of teeth that have been rotated during alignment.
Conclusion
Invisible retainers have had a high level of patient acceptance because they are inconspicuous. They can be used effectively either as retention appliances that allow some finishing occlusal adjustments or as transitional retainers to hold teeth in position until appropriate functional appliances are available.
ACKNOWLEDGMENTS-- The authors thank Dr. Raymond P. Howe, Ms. Katherine A. Ribbens, Mr. John T. Jankowiak, and Mr. Brian D. Willison for critically reviewing the manuscript. Illustrations are by Mr. William L. Brudon. The preparation of this manuscript was supported in part by USPHS Grant DE-03610.